")
The moment you press the power button, your machine stays lifeless and unresponsive. There’s no light, no sound, only silence, a PC user’s worst nightmare. But before you panic, it’s worth learning how to check if a motherboard is dead the right way. A system that looks dead doesn’t always mean the motherboard is truly gone. In many cases, the issue comes from a faulty power supply, a loose cable, or even bad RAM causing the system to act unresponsive.
Unfortunately, one of the most common problems with fathering a dead motherboard is that it is often overlooked and thus mistaken for a minor problem with other parts of the hardware. One may easily end up wasting both time and money trying to troubleshoot and even replacing the wrong part if no proper testing is done. Hence, it is of utmost importance to be skilled in assessing whether a motherboard is beyond help or not.
You will, by the end of this article, be able to test your motherboard, determine if it is really dead, and maybe even bring it back to life without needing to get the help of a technician.
Understanding the Role of a Motherboard
Consider the motherboard as the central nervous system of the computer, controlling various parts like the CPU, RAM, GPU, and storage. Without it, the computer is nothing but a collection of expensive unfunctional parts.
Pressing the power button signals the motherboard to power up the whole system. It performs a hardware check, activates the CPU, and issues the command to boot the operating system. If the motherboard is defective, however, the entire sequence of commands is interrupted, and the PC will not respond at all.
Here’s a quick breakdown of what it does:
- Connects all hardware components: CPU, RAM, GPU, power supply, storage, and peripherals.
- Distributes power: It ensures each part gets just the right amount of power to function safely.
- Transfers data: The motherboard’s circuits and buses allow components to communicate seamlessly.
- Runs firmware (BIOS/UEFI): This tiny software helps start up your computer and checks for hardware issues before the operating system loads.
Therefore, when the motherboard is no longer functioning, the signs can be misleading; for instance, you may observe that the cooling system is running, the lights are on, but there is still no booting process. Grasping its function facilitates the differentiation of a dead board from faulty GPU, RAM, or power supply.
If you are aware of the motherboard’s role, you will be able to diagnose the problem accurately that way, and not through replacing parts that were never defective.
Step 1: Check the Power Source Before Blaming the Board
Before you call your motherboard dead, start with the basics, power. You’d be surprised how many “dead” PCs are just suffering from a simple power issue.
Confirm Wall Outlet, Cable & Power Switch
First things first, make sure your computer is actually getting electricity. Plug another device, like a lamp or phone charger, into the same wall outlet. If that works, move on to the power cable. Look for cuts, loose ends, or a bent plug.
Also, check your surge protector or extension cord. These can quietly fail over time and block power even when their light stays on. Lastly, double-check the power switch on the back of your PC’s power supply, it’s easy to forget that tiny rocker switch exists.
If your PC still doesn’t respond, don’t panic yet. At this point, it’s often a simple “no power to motherboard” issue rather than a full hardware failure.
Test the Power Supply (PSU)
Now it’s time to test the power supply unit (PSU), the heart of your computer’s power flow. If it’s faulty, your motherboard never even gets a chance to wake up.
You can try the quick paperclip test: unplug the PSU, insert a bent paperclip between the green wire and any black wire on the 24-pin connector, and plug it back in. If the fan spins, the PSU at least powers on.
For a more reliable check, use a PSU tester. It measures voltage levels and tells you if the unit is providing stable power. While you’re at it, ensure the 24-pin motherboard connector and 8-pin CPU connector are firmly attached, these are the lifelines of your system.
If you find the PSU dead or unstable, that’s likely the root cause. Replacing it could bring your PC back to life without ever touching the motherboard.
Step 2: Try a Minimal Boot Setup
When your PC refuses to start, it’s time to strip things down to the basics. The goal here is to find out whether the motherboard can still boot on its own or if another part is holding it back.
Disconnect Everything Non-Essential
Start by unplugging every non-essential component. You only need the CPU, one stick of RAM, and the power supply connected. Remove your graphics card, storage drives, USB devices, and any extra RAM sticks.
This setup, often called a minimal boot, helps isolate the problem. If your motherboard powers up with just the essentials, it means one of the removed components was likely causing trouble.
Here’s a quick checklist:
- Disconnect all hard drives or SSDs
- Unplug the graphics card (GPU)
- Remove extra RAM sticks
- Detach all USB devices and front panel accessories
- Keep only CPU, PSU, and one RAM stick installed
Once everything unnecessary is out, press the power button and see what happens.
Watch for Signs of Life
Now, pay attention to any small hints that your motherboard is alive.
- Fans spinning: This usually means the power supply is working and delivering current to the board.
- LED lights glowing: Many modern motherboards have diagnostic LEDs. A glowing or blinking light means power is reaching the board, even if it doesn’t boot fully.
- Beep sounds: If your board has a small speaker, listen for beeps. A single short beep often means the motherboard passed the POST (Power-On Self-Test) successfully. Multiple beeps or no sound at all could indicate a problem.
If there’s no POST, no beep codes, and no lights at all, the issue might lie with the motherboard itself. But if you do notice life signs, you’re getting closer to finding what’s wrong.
A minimal boot setup cuts out the noise and gives you a clear view of whether your motherboard is truly dead or just being held back by another faulty component.
Step 3: Reseat RAM and GPU (Quick Fix That Works Wonders)
Sometimes, your computer just needs a little nudge to wake up. Loose memory or graphics cards are one of the most common reasons a PC refuses to boot, and the fix is often easier than you’d expect.
Remove and Reinsert RAM Modules
Start with the RAM sticks. Power off your system completely and unplug it from the wall. Open your case and gently pop out each memory stick. While doing so, take note of a little dust buildup or bent contacts, they can easily interrupt the connection.
Next, reinsert one stick into the first slot until you hear a solid click. If the system still won’t start, move that same stick to another slot and try again. This helps you figure out whether the issue is with the RAM itself or the slot on the motherboard.
You can also swap the sticks if you have more than one. Many “dead” motherboards turn out to be a faulty RAM slot problem, not a total board failure.
Check GPU Seating or Remove It Entirely
If your PC uses a dedicated graphics card, double-check that it’s firmly seated in its PCIe slot. A slightly loose GPU can cause the system to power on but never display anything.
Remove the card and inspect the connectors. Make sure there’s no visible damage or dust blocking the contacts. Then, push the GPU back into the slot until it’s perfectly aligned.
If your CPU has integrated graphics, try removing the GPU completely and connecting your monitor to the motherboard’s video output instead. If the computer starts working this way, your graphics card might be shorting out the power or failing under load.
A quick reset like this can sometimes bring a seemingly dead PC back to life. It’s simple, safe, and worth trying before assuming the motherboard is gone.
Step 4: Inspect the Motherboard for Physical Damage
If your computer still won’t turn on after checking the basics, it’s time to get a little closer. Many times, the motherboard gives away clues that something’s wrong, you just have to look carefully.
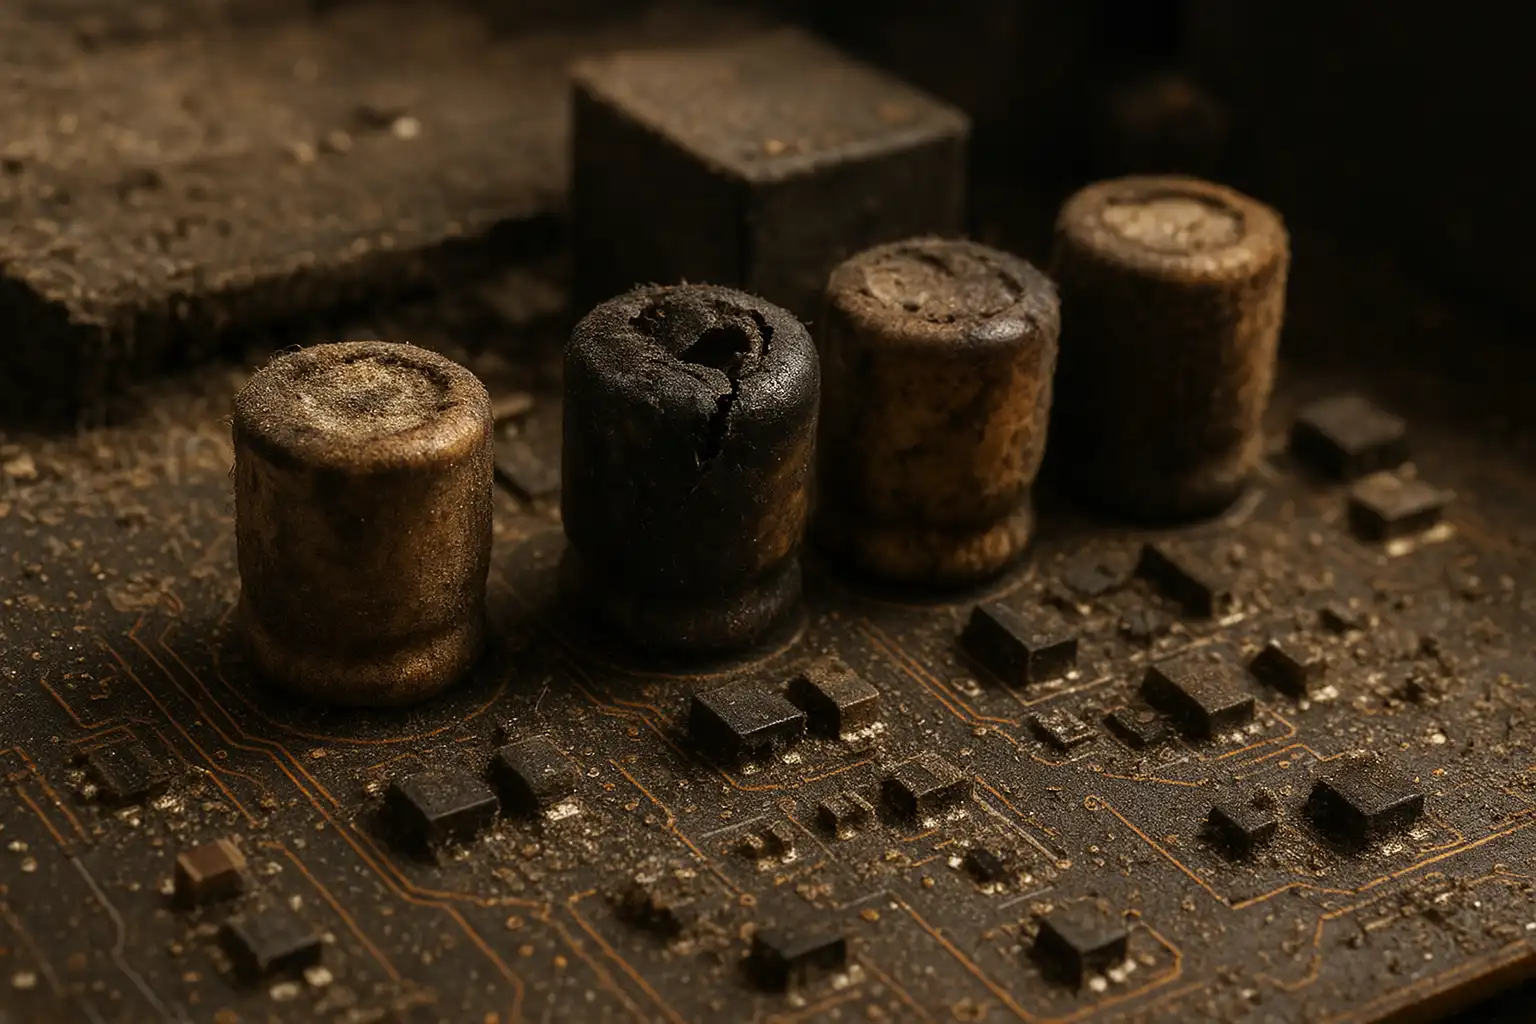
Look for Visual Burn Marks or Damaged Components
Unplug your computer and open the side panel slowly. Grab a small flashlight and take a careful look at your motherboard. You don’t need to be a pro to spot something odd. Just trust your eyes and nose.
Here’s what to look for:
- Swollen or leaking capacitors: These tiny cylinder-like parts should look flat on top. If one is bulging or tilting, it’s damaged.
- Dark or burnt spots: A small black mark near a connector or chip usually means a short circuit or overheating.
- A burnt smell: If something smells like burnt plastic, it probably is. That scent often comes from a fried component.
- Corrosion or greenish stains: This can appear after moisture or a spill. It eats into the metal traces on the board and breaks the connection between circuits.
A little dust is fine, but corrosion or burnt spots are red flags. If you see these, your motherboard might have suffered a power surge or internal failure.
Check for Short Circuits or Loose Screws
Once you’ve inspected the surface, make sure the motherboard isn’t shorting out underneath. A simple misplaced screw can shut down your whole system.
Do a quick check:
- Look under the board for any loose screws or metal bits.
- Confirm standoffs are in the right place. Each hole on the motherboard should rest on a standoff, not directly on metal.
- Gently shake the case to listen for any small parts rolling around, that’s a sign of trouble.
- Clean out dust or debris that might be bridging tiny circuits.
Short circuits can mimic the same symptoms as a dead board, so double-checking this step can save you from replacing a perfectly good motherboard.
Taking a few minutes to inspect everything closely often reveals more than a tool ever could. You’re not just looking for damage; you’re learning how your hardware tells its story.
Step 5: Reset CMOS and BIOS Settings
Sometimes the computer isn’t broken. It’s just stuck. The BIOS, which controls how the system starts, can hold onto bad settings that stop everything from working. Clearing those settings gives your motherboard a chance to start fresh.
Remove and Replace the CMOS Battery
Inside every motherboard, there’s a small silver battery about the size of a coin. It keeps the BIOS memory alive even when the computer is unplugged. When that memory gets corrupted, your PC might act dead.
You don’t need tools or special gear to fix this. Just a bit of patience.
Do this:
- Turn off your PC and pull the power cord out of the socket.
- Open the case and look for the shiny round battery.
- Gently lift it out with your finger or the edge of a plastic pen cap.
- Wait for about five minutes so any saved data fully clears.
- Put the battery back in or replace it with a new one.
Now plug your system back in and hit the power button. If the fans start spinning or you see the screen flicker, the reset works. That little CMOS battery fix can solve a lot of no-boot BIOS problems that look much worse than they really are.
Use BIOS Flashback (If Supported)
If nothing changes, don’t lose hope yet. Many newer motherboards have a feature called BIOS Flashback. It lets you reinstall the BIOS even if the system won’t power up completely.
Here’s the simple version of how it works:
- Visit your motherboard maker’s website and download the latest BIOS file.
- Rename the file exactly as the instructions say.
- Put that file on an empty USB drive.
- Plug it into the BIOS Flashback port on your motherboard.
- Press the Flashback button and wait. You’ll usually see a small light blinking while it works.
When the blinking stops, the BIOS is restored. In many cases, that’s all it takes for the board to come back to life. What looks like a hardware failure can sometimes be nothing more than a corrupted BIOS.
Resetting the CMOS or refreshing the BIOS is like pressing a mental reset button for your motherboard. It forgets the confusion and starts thinking clearly again.
You can also check Intel’s official guide on how to reset CMOS or BIOS settings for safe motherboard recovery.
Step 6: Use Tools to Confirm Motherboard Death
Before you call the board dead for good, it’s worth doing one last round of testing. Sometimes the problem hides in plain sight, and a few quick checks can save you from replacing a perfectly good motherboard. Think of this step as running a little motherboard diagnostic before the funeral.
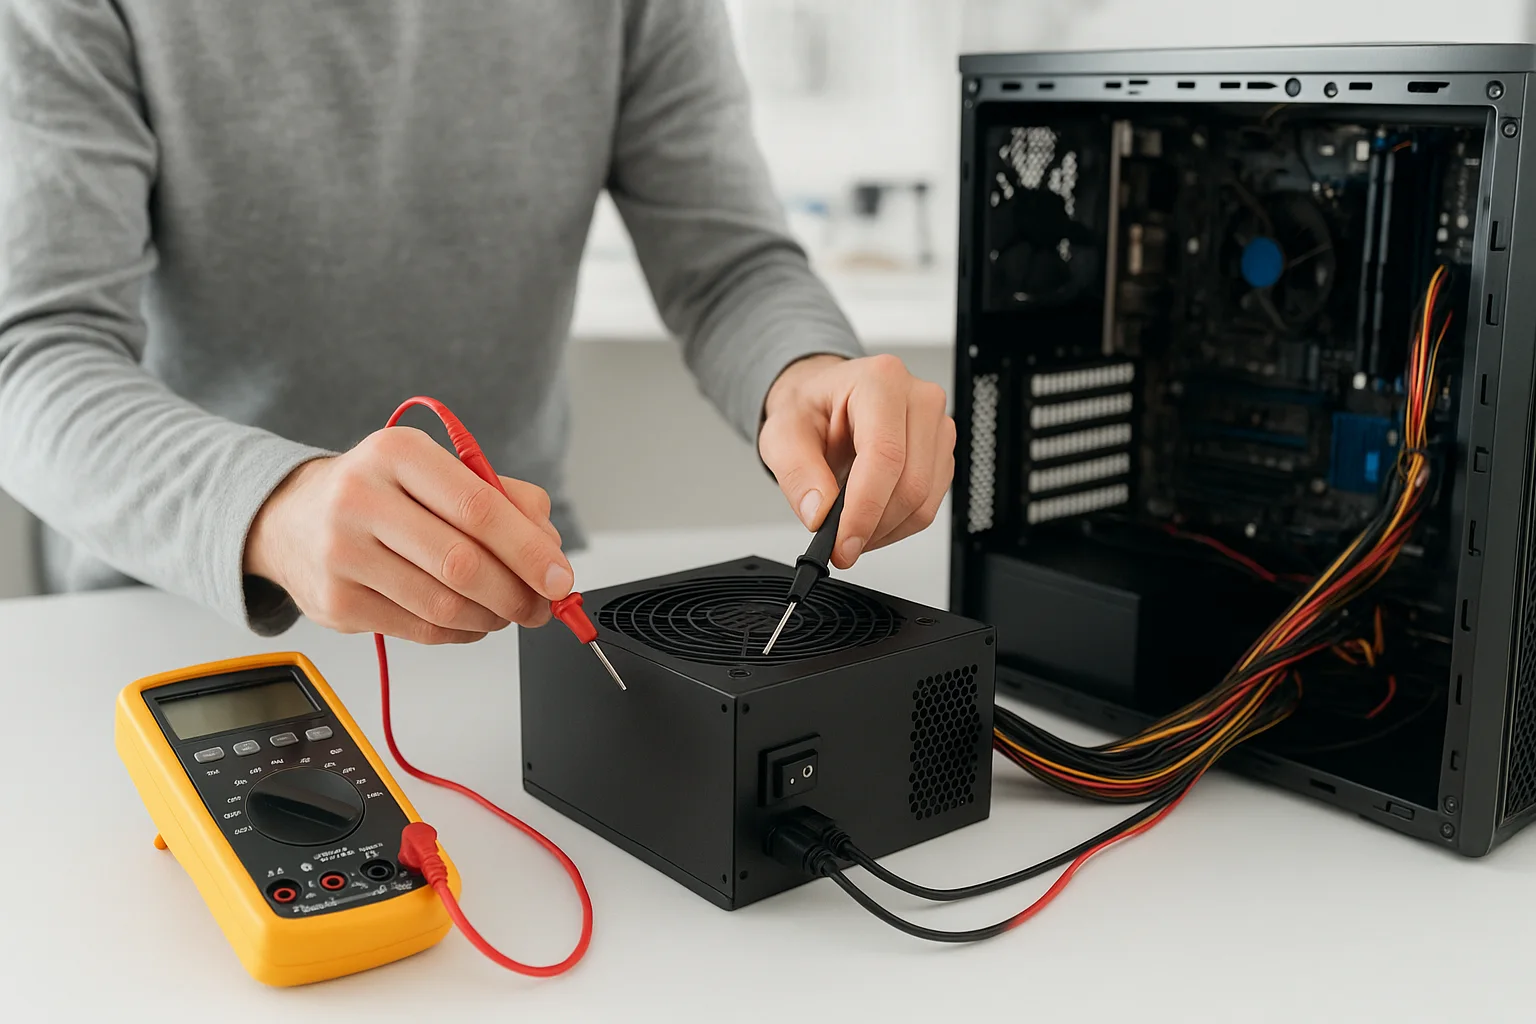
Test with a Multimeter or POST Card
If you’ve got a multimeter, you’re already halfway there. This tool helps you see whether electricity is actually reaching the right parts of your board.
Here’s what to do:
- Unplug the power cable, open your case, and ground yourself to avoid static.
- Plug the PSU back in but don’t turn the PC on yet.
- Set your multimeter to DC voltage mode.
- Carefully check key points, the 24-pin connector, CPU socket area, and fan headers.
- You should see consistent readings around 3.3V, 5V, and 12V.
If the readings are flat or jumping all over, the power delivery on the board isn’t stable, that’s a big red flag.
For a deeper look, you can use a POST card (Power-On Self-Test card). It plugs right into your motherboard and shows short codes on a tiny display. Those codes tell you what’s happening behind the scenes during startup. If the card shows nothing at all, it usually means the board isn’t even trying, a strong sign of internal failure.
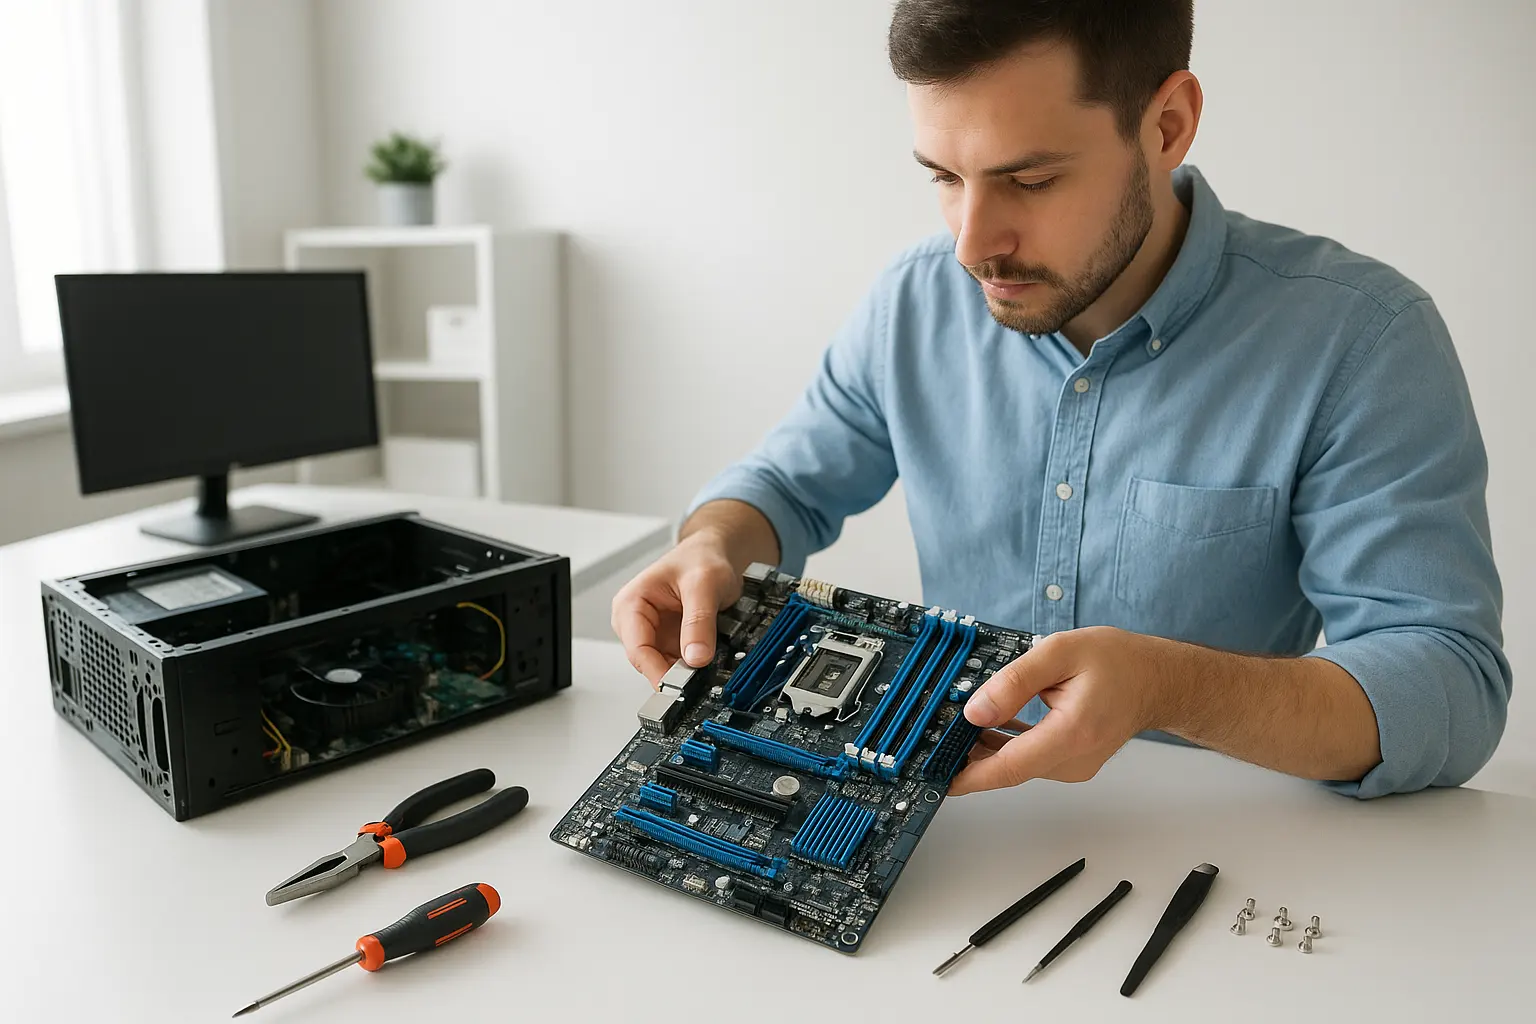
Swap Components to Cross-Check
When in doubt, go back to basics. A good process of elimination can reveal the truth faster than any fancy tool.
Here’s how:
- Take your CPU, RAM, and power supply out.
- Test each part in another working PC, one at a time.
- If all those parts work perfectly elsewhere, your motherboard’s the one causing trouble.
It’s a slow process, but it’s the most reliable way to check if a motherboard is dead. After all, computers are like puzzles, every piece needs to fit and communicate. When the board stops doing that, the rest of the system just sits there waiting for instructions that never come.
Step 7: Signs That Confirm a Dead Motherboard
At some point, every PC builder faces this dreaded moment, the silence that says your motherboard might’ve taken its last breath. But before you declare it officially gone, here’s how to tell when it’s truly over.
Major Dead Motherboard Symptoms
When a motherboard dies, the whole system goes cold and lifeless. These are the big warning signs you’ll notice right away:
- No lights, no fans, no display: You press the power button, and nothing happens. No spin, no glow, no response, just silence.
- No beeps, even with a speaker connected: A healthy board gives a small beep when something’s wrong or when it starts up properly. If it stays quiet, that’s not a good sign.
- Power LED on, but no POST: Sometimes the power light comes on, but the system doesn’t boot. No BIOS screen, no signal to the monitor. This usually means the board is receiving power but failing to pass it along.
At this stage, your system isn’t just being stubborn, it’s not responding at all. These dead motherboard signs often confirm what you’ve been suspecting all along: the board has stopped communicating with the rest of the hardware.
If you’ve already ruled out other components like RAM, GPU, and PSU, and the motherboard’s not responding despite everything, then yeah, it’s time to face the truth, your board is gone.
Step 8: What to Do If Your Motherboard Is Dead
If you’ve checked every possible cause and your motherboard still refuses to wake up, it’s okay. It happens even to careful PC owners. The big question now is what to do next, fix it or replace it? Let’s look at both options before you spend a dime.
Repair vs. Replace: Which Is Smarter?
Begin with the warranty check. Most motherboards have at least a one-year warranty and in some cases, the manufacturer guarantees a longer period of up to three to five years. If you are fortunate the company will either send you a new board or repair the one you have for no cost. Always take this route first, it is less expensive and less of a problem.
On the other hand, if the warranty period is over, repairs may not be successful every time. Some laptop repairers can take out burnt capacitors or damaged chips, but these repairs do not always last. Most of the time, you will pay quite a sum, almost equal to the price of a new motherboard. Moreover, since technology is changing very rapidly, buying a new one often means getting faster performance, better compatibility, and fewer troubles in the future.
If you decide to replace your board, check out PCMag’s updated list of the best replacement motherboards for 2025 to find one that fits your system.
In case your system is old, it is usually better to replace the motherboard. It is not only a repair but also a renewal of the whole setup.
Prevent Future Failures
After your newly installed motherboard starts operating, it’s time for you to take some simple precautions to secure it. Connect your computer to a surge protector or, even better, to an uninterruptible power supply (UPS). Sudden power cuts and voltage spikes, although not visible, are common causes for frying a motherboard within seconds.
Along with that, you can also try to keep your computer clean. This is because dust creates a negative environment for the electronic parts, and eventually, heat from the trapped dust will slowly wear the electronic parts out. So, every few weeks, a quick clean of your system can actually mean adding years to its life.
There is one small but very important habit, to always ground yourself before touching the inner parts of your PC. Although static electricity may not seem like much, it is, in fact, very potent when it comes to damaging sensitive components. With the help of a simple anti-static wristband or even touching a metal part of your case before that, you can avoid making an expensive mistake.
It’s true that these precautions don’t take much time, but they do make a significant difference. The way you treat your motherboard will determine whether or not you’ll be able to avoid another dead-system scare anytime soon.
Final Thoughts: How to Check if a Motherboard is Dead
When nothing happens, i.e. your computer remains unresponsive, the most common and immediate thought is that the motherboard has failed but in reality, that is far from being the truth most of the time. A weak power supply, bad RAM, or loose wires can create the same problem which leads to the same symptoms. Just take a slow and methodical approach to test every part and finally confirm the real one before replacing anything.
If, however, you have conducted all the checks and found that your motherboard really won’t be working at all, think of it as an opportunity to get a better one. You get along with a new board at a faster speed, large compatibility, and more reliability.
Furthermore, when everything is up and running again, take good care of it by using a surge protector, cleaning it regularly, and grounding it properly. Being aware of how to evaluate whether a motherboard is dead not only reduces expenses but also gives the user the confidence to deal with PC problems like a professional.
FAQs About Checking a Dead Motherboard
How do I know if my motherboard is dead?
If your computer doesn’t power on, shows no lights or fans, and doesn’t beep, the motherboard might be dead. Try testing your PSU and RAM first to confirm.
Can a motherboard be repaired?
Yes, but it depends on the damage. Minor issues like bad capacitors can be fixed, but severe electrical damage usually requires a replacement.
What causes a motherboard to fail?
Common reasons include power surges, overheating, dust buildup, and improper installation of components.
Can a dead motherboard be fixed at home?
Usually not. You can check for loose connections or reset the CMOS, but advanced repairs need proper tools and expertise.
Will my PC turn on with a dead motherboard?
No, it won’t. If the motherboard is completely dead, the system won’t power on or reach the BIOS screen.
Is it worth replacing a dead motherboard?
If your PC is fairly new, yes replacing the board restores performance. For older setups, upgrading to a newer model is often smarter.