")
Custom keyboards have evolved from niche hobby to full‑blown craft yet few boards spark as much buzz as the Mode SixtyFive. Its 2024 refresh introduced lattice‑block mounting, a tool‑free magnetic rear bar, and a dozen plate options that let you chase the “perfect thock.” In the last six months I’ve built three SixtyFives for friends, each with a distinct acoustic personality. This guide distills those builds mistakes included so you avoid stripped screws, pingy plates, and firmware headaches on day one. Expect real‑world photos, under‑desk mic placements for sound tests, and shortcuts that shave an hour off the average beginner build.
Who this guide is for: First‑time builders who want a single resource from unboxing to first keystroke; experienced hobbyists chasing a deeper sound; and gamers looking to squeeze performance tweaks out of a 65 % layout.
What You Need Before You Start
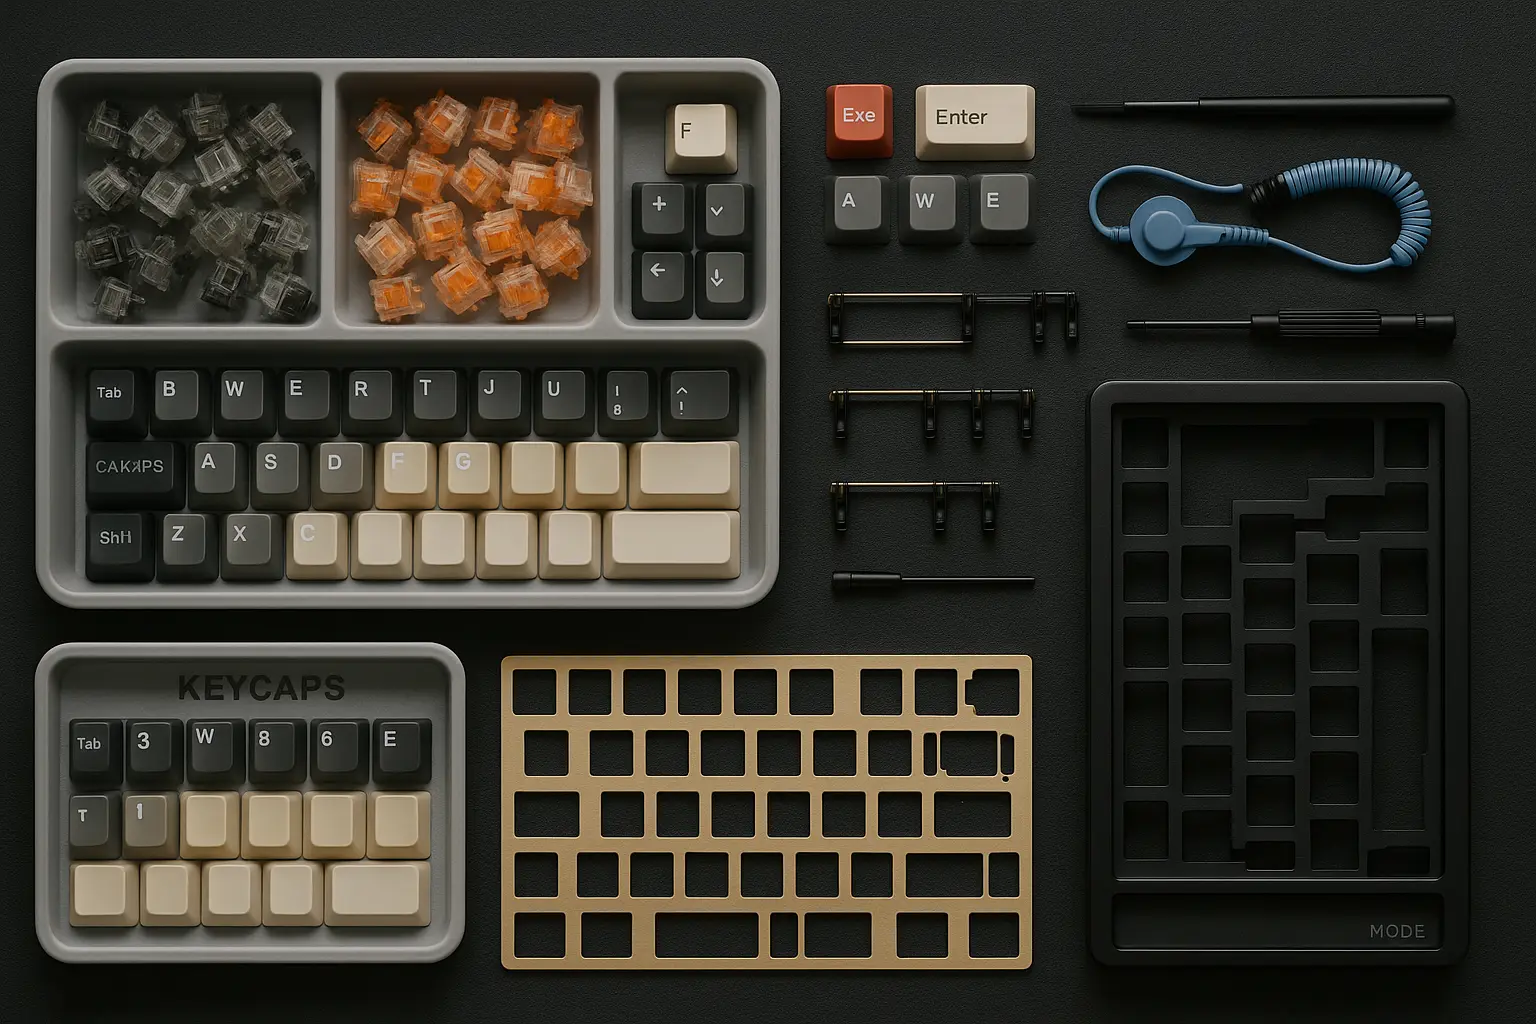
A great build starts with the right kit, tools, and mindset. Below is an expanded checklist with sourcing advice:
| Category | Item | Why It Matters | My Recommendation |
|---|---|---|---|
| Core Parts | Mode SixtyFive kit (top, bottom, PCB, plate, weight, daughterboard) | Defines layout, mounting style, and final acoustics | Order via Mode Designs configurator during in‑stock drops (ship in 5–7 days) |
| Switches (≥70) | Dictate feel and sound; choose linears for smoothness, tactiles for feedback | Mode Reflex linears (factory‑lubed) or Gateron Oil Kings for deeper pitch | |
| Keycaps | Affect typing angle, pitch, and aesthetics | Doubleshot PBT Cherry profile—durable legends and low shine | |
| Stabilizers | Prevent rattle on large keys | Durock v2 screw‑ins, 1.6 mm PCB support | |
| Tools | Precision screwdriver (#00), hex 1.5 mm, switch puller, keycap puller | Protect screws and finish | iFixit Mako bit set; stainless switch puller |
| Lube kit (Krytox 205g0 paste, 105 oil, size‑0 brush) | Smooths switches & stabs | 10 g jar lasts ~2 builds | |
| Desoldering braid (optional) | Safety net for bent switch pins | 2 mm Chemtronics braid | |
| Desk mat & ESD wrist strap | Prevent static discharge | Any XL mat; $8 strap on Amazon | |
| Software | VIA or QMK Configurator, latest JSON for SixtyFive | Maps keys and layers | Download at modedesigns.com/support |
| Mindset | Time & patience | Rushing leads to stripped threads | Block a distraction‑free 3‑hour window |
Why 70 switches? The SixtyFive uses 67–68 depending on split‑backspace; two extras cover lubing mishaps.
Understanding the Mode SixtyFive Design
The SixtyFive isn’t just another 65 % board it’s a modular playground.
- 65 % layout: Combines arrow keys and a navigation column (PgUp, PgDn, Del) without the function row. Muscle memory from TKL’s arrow cluster transfers instantly, making it ideal for gamers and coders who need compact real estate yet full navigation.
- Mounting styles:
- Top‑mount: Classic, firm, and vivid in high frequencies best for typists who like crisp feedback.
- Isolated top‑mount: Adds silicone isolation blocks that float the plate, knocking down case resonance and softening bottom‑out.
- Stack‑mount: PCB sits on gaskets over a half‑plate maximum flex for “marble” typing feel.
- Plate materials in practice:
- FR4: Warm midrange, mild flex. Great all‑rounder.
- Carbon fiber: Stiff with short decay preferred by speed typists.
- Polycarbonate: Most flex; absorbs high‑end ping. Pair with linears for plush thock.
- Copper: Bright attack, heavy mass. Match with thick PBT caps for balanced tone.
- Weight selection: A heavier weight (brass/copper) increases inertia, reducing high‑frequency case resonance, translating to deeper perceived pitch. Anodized aluminum weight trims 150 g handy if you travel with your board.
Pro tip: Mix plate and weight materials strategically e.g., carbon‑fiber plate + brass weight = articulate attack with low‑frequency sustain.
Step‑by‑Step Build Guide
1. Prep Your Workspace
Goal: Create a safe, organized bench that prevents static shocks and lost screws.
- Lay the mat: Use a dark‑colored XL mat-small parts pop visually.
- Ground yourself: Clip ESD strap to PC case ground or PSU screw; verify continuity with a multimeter (<2 Ω).
- Sort hardware: Silicone baking cups hold screws/blocks; label them with painter’s tape.
- Update firmware tools: Install VIA desktop or open the web client; download QMK Toolbox for emergency flashing.
2. Install and Tune Stabilizers
Stabilizers account for 80 % of perceived rattle.
- Clip mod (optional): Remove two tiny legs on each housing, prevents bottom‑out noise.
- Lube checklist:
- 205g0 on stem rails & interior housing walls.
- 105 oil on wire bends and shoulders (not the ends).
- Band‑aid mod: Stick 2 mm squares of medical tape over PCB stab cut‑outs, reduce wire slap.
- Mount & torque: Tighten screws until the washer stops spinning; overtightening warps PCBs.
- Rattle test: Press the stabilizer keycap, hold board near ear, if you hear metallic ticks, re‑grease wire shoulders.
3. Lube and Mount Switches
Properly lubed linears add up to 15 dB less scratch noise.
- Station setup: Place stem holder, spring tray, stem rail brush.
- Process:
- Dip brush lightly, wipe excess on jar lip.
- Paint a whisper‑thin coat on stem rails, center pole, and lower housing rails.
- Apply 105 oil to spring (bag‑lube method).
- Filming decision: If switch has wobble >0.05 mm (check with calipers), apply 0.15 mm films.
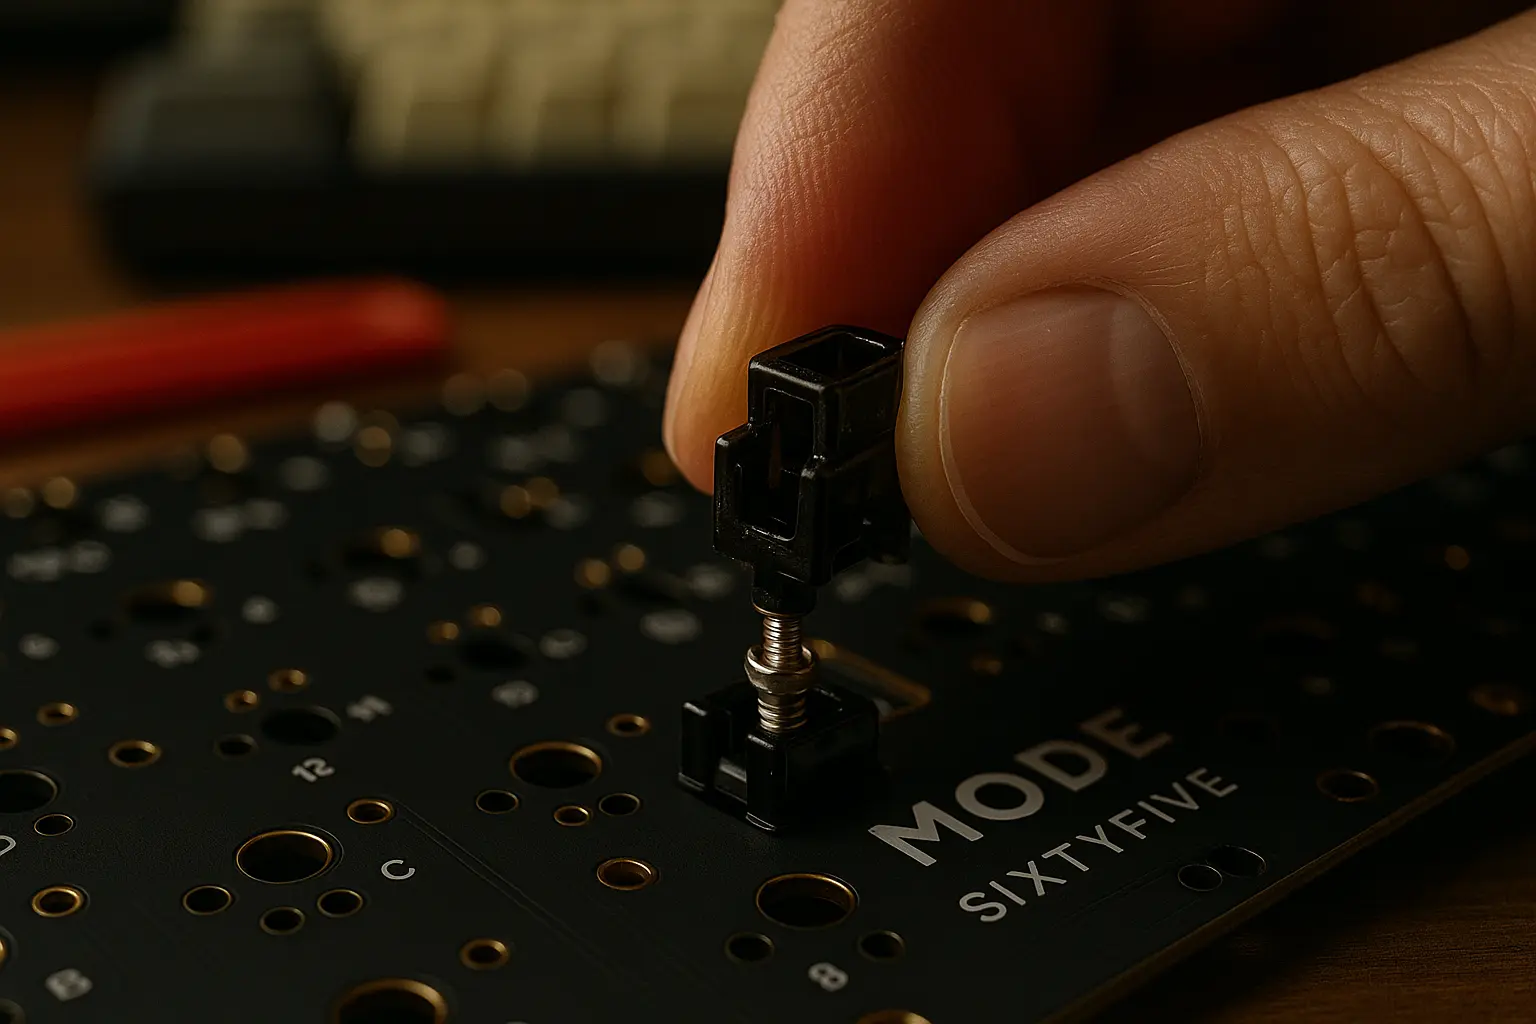
- Mounting orientation: South‑facing = LED notch downward; align pins with PCB sockets listen for soft click.
- Row test: After each row, plug PCB into PC, open VIA → Key Tester; detect mis‑registers early.
4. Plate & PCB Assembly
Time to lock in acoustic character.
- Foam sandwich stack (top→bottom): Plate → IXPE sheet (included) → PCB → PE foam → Bottom case.
- Screw sequence: Torque screws in a star pattern: top‑left, bottom‑right, top‑right, bottom‑left. Repeat center. Target ~0.25 Nm hand tight plus quarter‑turn.
- Flex tuning: Want softer flex? Omit middle screws and use half‑plate; for LAN events, fully screw down for durability.
5. Case Assembly & Weight Installation
- Daughterboard alignment: Connect ribbon cable; ensure blue tab faces PCB silkscreen.
- Brass weight polish: Wipe with microfiber + isopropyl to remove fingerprints before trapping them forever.
- Magnetic rear bar: Insert bar, then flip board, gravity keeps it seated.
- Final torque: Alternate corners to avoid case skew; verify even seam (no daylight).
6. Flash Firmware & Set Up VIA
First boot checklist:
- Boot + hold
Escto enter bootloader, green LED on. - Open QMK Toolbox → Select MCU:
STM32F072→ Flash latest.bin. - Reboot → VIA detects PCB.
- Layer layout:
- Layer 0: Standard ANSI 65 %.
- Layer 1 (Fn): F‑row on number keys, Home/End, RGB toggle.
- Layer 2: Media controls & sleep.
- Rapid‑trigger tweak (gaming): Reduce debounce to 3 ms in tab “Key Settings”; test for chatter.
7. Final Inspection & First Keystrokes
- Gasket compression check: Squeeze case, should rebound silently, no squeaks.
- Stabilizer sanity: Type “The quick brown fox” to sample every key width.
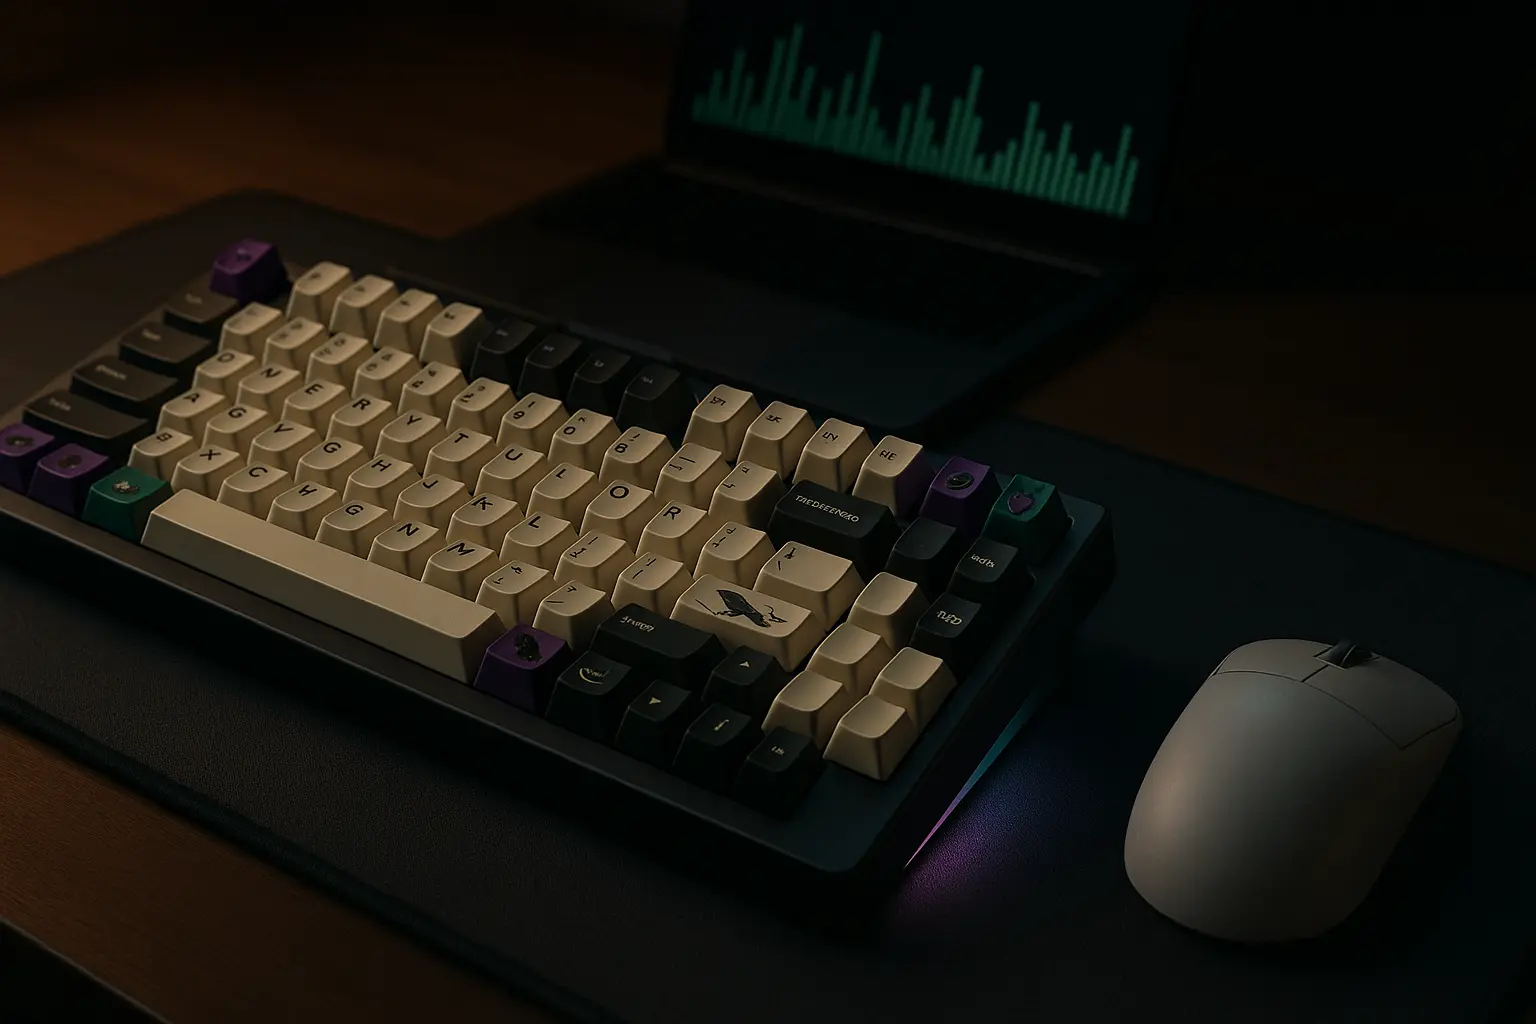
- Sound test: Record 30 s; analyze waveform in Audacity, look for consistent decay tails across rows.
- Benchmark: In
MonkeyType, average ‑2 wpm from your usual TKL speed due to shorter right‑hand travel.
Troubleshooting & Sound Testing
| Symptom | Probable Cause | Fix | Time |
| High‑pitch ping on Enter | Plate screws overtightened | Back off two clicks | 2 min |
| Spacebar “barrel” echo | Hollow case cavity | Add 1 mm shelf‑liner under PCB | 5 min |
| Random key repeats | Debounce <3 ms | Raise to 5 ms | 1 min |
| USB disconnects | Ribbon cable loose | Reseat, add Kapton tape | 3 min |
Advanced sound shaping recipes:
- Deep Thock: Polycarbonate plate + POM switches + PE foam + brass weight.
- Crisp Clack: Carbon‑fiber plate + tactile switches + no foam + aluminum weight.
- Soft Rain: FR4 plate + lubed linears + O‑ring top mount + desk mat with sorbothane.
Customization & Upgrades
Customization doesn’t stop at keycaps:
- Keycaps deep dive:
- Cherry PBT: 1.5 mm walls, mid‑scooped tops, balanced tone.
- MT3 ABS: Deep dish, retro aesthetic, lower pitch but steeper learning curve.
- KAT PBT: Uniform R2 height, excellent for Ortho mod experiments.
- RGB underglow wizardry: VIA’s advanced tab lets you script per‑key animations. Try “Breath” on low intensity for ambient desk lighting that doesn’t distract.
- Artisan integration: Leave Esc blank for resin artisan; or slot a metal novelty on the right nav column to balance brass weight visually.
- Plate swapping workflow: Unscrew rear bar, remove six case screws—plate pops out without desoldering on hot‑swap PCB. Record before/after sound tests to dial‑in signature.
Maintenance & Long‑Term Care
Treat your board like a mechanical watch:
| Interval | Task | Detail |
| Monthly | Dust blow‑out | Compressed air at 20 psi, angle 30 ° |
| Quarterly | Keycap wash | Warm water + mild detergent, air‑dry 12 h |
| Semi‑annually | Switch relube | Target heavily used alphas first |
| Annually | Firmware audit | Check QMK changelog, flash LTS build |
Tarnish prevention: Store board in airtight bag with silica packs if RH > 60 %. For existing patina, rub brass weight with Flitz polish, then seal with carnauba wax.
Community Resources & Further Reading
- r/MechanicalKeyboards: Weekly Q&A for quick help; tag your post “SixtyFive Build Log.”
- Mode Discord → #sixtyfive‑help: Real‑time troubleshooting from staff and power‑users.
- Tom’s Hardware 2024 Review: Independent measurements of flex and case acoustics.
Conclusion
A well‑tuned Mode SixtyFive can outclass boards twice its price, proving that engineering finesse and thoughtful materials matter more than hype. By following this expanded guide, you’ve not only assembled a premium keyboard, you’ve learned skills, lubing, plate tuning, firmware flashing—that transfer to any future build. Capture a sound test, post your time‑lapse build on social, and iterate: every tweak brings you closer to a keyboard that feels uniquely yours.
Show off your masterpiece! Share builds with #MySixtyFive and tag @bytevex. I showcase the best setups in my monthly community roundup.
Frequently Asked Questions
How long does a Mode SixtyFive build take?
Budget 2–3 hours for a first build, including switch lubing.
Which plate gives the deepest sound?
Polycarbonate or POM combined with brass weight offers the lowest pitch and longest decay.
Can I hot‑swap switches on the SixtyFive?
Yes, select the hot‑swap PCB during purchase; solderable PCBs provide more flex but need iron work.
Is VIA better than QMK for beginners?
VIA’s GUI is easier; switch to QMK if you need advanced macros or split layers.
What size screws secure the weight?
M2.5 × 5 mm stainless; torque to ~0.25 Nm.
Where can I buy replacement gaskets or lattice blocks?
Mode sells accessory packs; aftermarket options appear on Mech Market Reddit during group‑buy extras.