 – Everything You Need to Know")
Modern digital life has increased the prevalence of users typing in various languages simultaneously. Language learners who study Japanese and programmers who handle localization and keyboard enthusiasts exploring worldwide layouts probably know about the “JP keyboard layout” or Japanese JIS layout. What defines this layout and how does it differ from your standard US keyboard layout?
The JP keyboard layout also called the JIS (Japanese Industrial Standard) layout represents more than a QWERTY variation with added symbols. The layout exists to support Japanese writing system complexities by enabling users to input Hiragana and Katakana and Kanji characters. The JIS layout provides adaptable features through its additional keys and Henkan and Kana keys while supporting Romaji and Kana input; however, it requires users to invest time in learning its functionality.
This guide is your comprehensive review of the JP keyboard layout. We’ll cover:
- What makes the JIS layout different from ANSI/US keyboards
- How to type Japanese using Romaji or Kana
- Why some keys are completely unique
- Whether a JIS keyboard is good for gaming, programming, or daily typing
- And which keyboards are worth buying in 2025
✅ Whether you’re wondering “What is a JP keyboard layout?” or trying to decide if it’s the right fit for your typing habits, this review will break down everything in plain, practical language.
Let’s Going into the details of the Japanese keyboard layout and see if it deserves a spot on your desk.
What Is the JP Keyboard Layout (JIS)?
The JP keyboard layout, which goes by its official name Japanese Industrial Standard (JIS) keyboard, represents a QWERTY keyboard version that adapts for Japanese typing needs. The JIS layout remains close to the US ANSI layout design but features additional keys and character positions that support Japanese writing system requirements.
🧠 Key Facts About the JP Keyboard Layout:
- Key count: 109 keys (compared to 104 on a typical US ANSI keyboard)
- Primary design goal: Support for Hiragana, Katakana, Kanji, and Latin characters
- Extra keys: Includes dedicated keys for input control such as:
- 半角/全角 (Hankaku/Zenkaku) – toggles full-width and half-width characters
- 無変換 (Muhenkan) – cancels Kanji conversion
- 変換 (Henkan) – confirms Kanji conversion
- かな (Kana) – switches to direct Kana input mode
- Spacebar is shorter to make room for these input-specific keys
📏 What Makes JIS Layout Different from ANSI?
Even though both layouts use QWERTY as their base, the JIS layout introduces visual, functional, and ergonomic differences:
| Feature | JIS (JP Layout) | ANSI (US Layout) |
|---|---|---|
| Total Keys | 109 | 104 |
| Extra Input Keys | Henkan, Muhenkan, Kana, Hankaku/Zenkaku | Not available |
| Key Size & Placement | Smaller spacebar, more symbols | Standard spacebar, simpler layout |
| Language Support | Japanese + English | Primarily English |
| Typing System | Kana & Romaji support | Romaji via IME only |
These differences allow the JIS keyboard to handle the multiple character sets used in the Japanese language, which wouldn’t be practical or intuitive on a standard English keyboard.
Q: What is the JP keyboard layout used for?
A: The JP keyboard layout is used for typing in Japanese. It supports multiple input methods including Kana and Romaji and includes dedicated keys for switching between character sets like Hiragana and Kanji.
🧩 Why Was the JIS Layout Created?
Japan needed a standardized way to type both native Japanese characters and Latin-based text. The JIS layout was developed under national standards to ensure compatibility across operating systems, hardware, and educational systems. Over time, it evolved to support modern Japanese input techniques and is now the default physical layout for keyboards sold in Japan.
💬 Pro Tip:
Even if you don’t own a JP keyboard physically, you can still simulate the JIS layout on a US keyboard using the Japanese IME (Input Method Editor). We’ll show you how later in this guide.
JP vs US Keyboard Layout: What’s the Difference?
The JP keyboard layout (JIS) surpasses language support when compared to the US layout (ANSI). The layouts appear alike at first sight yet they deliver substantially different user experiences in actual use. Anyone switching keyboard layouts or studying Japanese or working with multiple languages needs to know these differences.
Key Differences Between JP and US Keyboards
1. Total Number of Keys
The JP keyboard has 109 keys, while the US layout typically includes 104 keys. This means the JP layout adds extra functionality to support Japanese input modes without sacrificing standard typing features.
2. Input-Specific Keys on JIS Keyboards
JP keyboards feature dedicated keys designed for Japanese input. These keys include:
- 半角/全角 (Hankaku/Zenkaku): Toggles between half-width (ASCII) and full-width (Japanese) characters.
- 無変換 (Muhenkan): Cancels character conversion (usually Hiragana to Kanji).
- 変換 (Henkan): Confirms the conversion from Hiragana to Kanji or brings up conversion candidates.
- かな (Kana): Switches to direct Kana input mode.
None of these exist on the standard US ANSI keyboard.
3. Key Placement & Symbols
The placement of common symbols can be disorienting at first. For example:
- The @ symbol is typed using Shift + 2 on a US keyboard, but on JP keyboards, it’s often found on a completely different key.
- The *backslash * and underscore _ are located differently.
- The spacebar is shorter on JP keyboards to accommodate additional keys.
4. Typing in Japanese vs English
Japanese keyboard layouts optimize their design to support typing in Japanese Kana characters along with Latin letters. A US keyboard allows Japanese input with proper settings yet the JP layout provides enhanced tactile switching between input modes because of its dedicated keys.
5. Visual Appearance
JP keyboards feature two sets of legends which include Roman letters alongside Hiragana/Katakana characters printed on individual keycaps. The dual labeling system enables straightforward operation between Japanese and English input methods. The layout of US keyboards consists exclusively of Latin characters.
Quick Comparison Table
| Feature | JP Keyboard (JIS) | US Keyboard (ANSI) |
|---|---|---|
| Total keys | 109 | 104 |
| Extra input keys | Henkan, Muhenkan, Kana, Hankaku/Zenkaku | None |
| Symbol positions | Varies from US standard | Consistent with US users’ expectations |
| Language support | Japanese + English | Primarily English |
| Spacebar size | Shorter to fit extra keys | Longer |
| Visual legends | Hiragana + Roman characters | Roman characters only |
Q: What is the difference between a JP and US keyboard layout?
A: The JP keyboard layout consists of 109 keys with particular input keys for Japanese characters and the US layout contains 104 keys without these features. The JP layout functions as an efficient tool to support English and Japanese typing operations.
Should You Switch?
The JIS keyboard layout delivers enhanced speed and precision to users who learn Japanese and work in localization and write frequently in Japanese. The ANSI layout remains more straightforward and globally compatible for general use especially when you play games or write code.
Understanding the Key Functions on a JP Keyboard
JP keyboard layout stands out through special keys dedicated to Japanese language input operations. The keys exist to facilitate user control between input methods while enabling mode switching and confirmation of conversions as well as Hiragana, Katakana and Kanji typing.
Your familiarity with US standard keyboards will make these keys appear strange when you first see them. Knowing their functions makes Japanese typing faster and more intuitive for users.
Key Functions Exclusive to the JIS Layout
Here’s a breakdown of the key functions you’ll only find on a JIS keyboard:
半角/全角 (Hankaku/Zenkaku)
- Translation: Half-width / Full-width toggle
- Function: Switches between standard Latin (half-width) characters and full-width Japanese characters.
- Use Case: Common when inputting names or addresses that need a specific format in official documents or software.
無変換 (Muhenkan)
- Translation: No conversion
- Function: Cancels character conversion. When you’re typing in Hiragana and don’t want it to convert to Kanji, this key prevents it.
- Use Case: Useful when you want to retain the phonetic spelling of a word or avoid auto-conversion mistakes.
変換 (Henkan)
- Translation: Convert
- Function: Converts Hiragana into Kanji or Katakana. Pressing it again cycles through alternative conversion suggestions.
- Use Case: Central to efficient Kanji input when using Romaji or Hiragana input modes.
かな (Kana)
- Translation: Kana input toggle
- Function: Switches the keyboard to direct Kana input mode. Each key is mapped to a specific Japanese syllable.
- Use Case: Useful for fluent typists who know the Kana layout and want to bypass Romaji input altogether.
Why These Keys Matter
The additional keys on the JIS layout provide a distinctive benefit to native Japanese speakers and students and professionals who handle Japanese material. The system enables quick switching between input modes by pressing one key without depending on software toggles.
Western users depend on IME software to accomplish this operation but JP keyboards present a built-in hardware method which accelerates typing speed and decreases user friction while enhancing workflow efficiency.
Example Scenario: Typing “日本語” (Japanese Language)
On a JP keyboard:
- Type nihongo in Romaji
- Press 変換 (Henkan) to convert it to “日本語”
- If the first suggestion isn’t correct, press Henkan again to scroll through options
- If you don’t want to convert, press 無変換 (Muhenkan) to keep it in Hiragana
This streamlined input flow is one of the core reasons why many professionals in Japan prefer using JIS keyboards over modifying US layouts.
Keyboard Layout Map: Common JP Key Additions
| Key Label | Meaning | Primary Purpose |
|---|---|---|
| 半角/全角 | Half/Full-width | Switch between Latin and Japanese characters |
| 無変換 | No Conversion | Cancel Kanji conversion |
| 変換 | Convert | Convert Hiragana to Kanji or Katakana |
| かな | Kana Input Toggle | Enable direct Kana input mode |
Q: What does the Henkan key do on a Japanese keyboard?
A: The Henkan key is used to convert Hiragana text into Kanji or Katakana. Pressing it again allows you to scroll through conversion suggestions.
Q: How do I switch to Kana input on a JP keyboard?
A: Press the Kana key to enter direct Kana input mode. This lets each key produce a specific Hiragana character based on the Japanese syllabary.
Romaji vs Kana Input: Which Is Better?
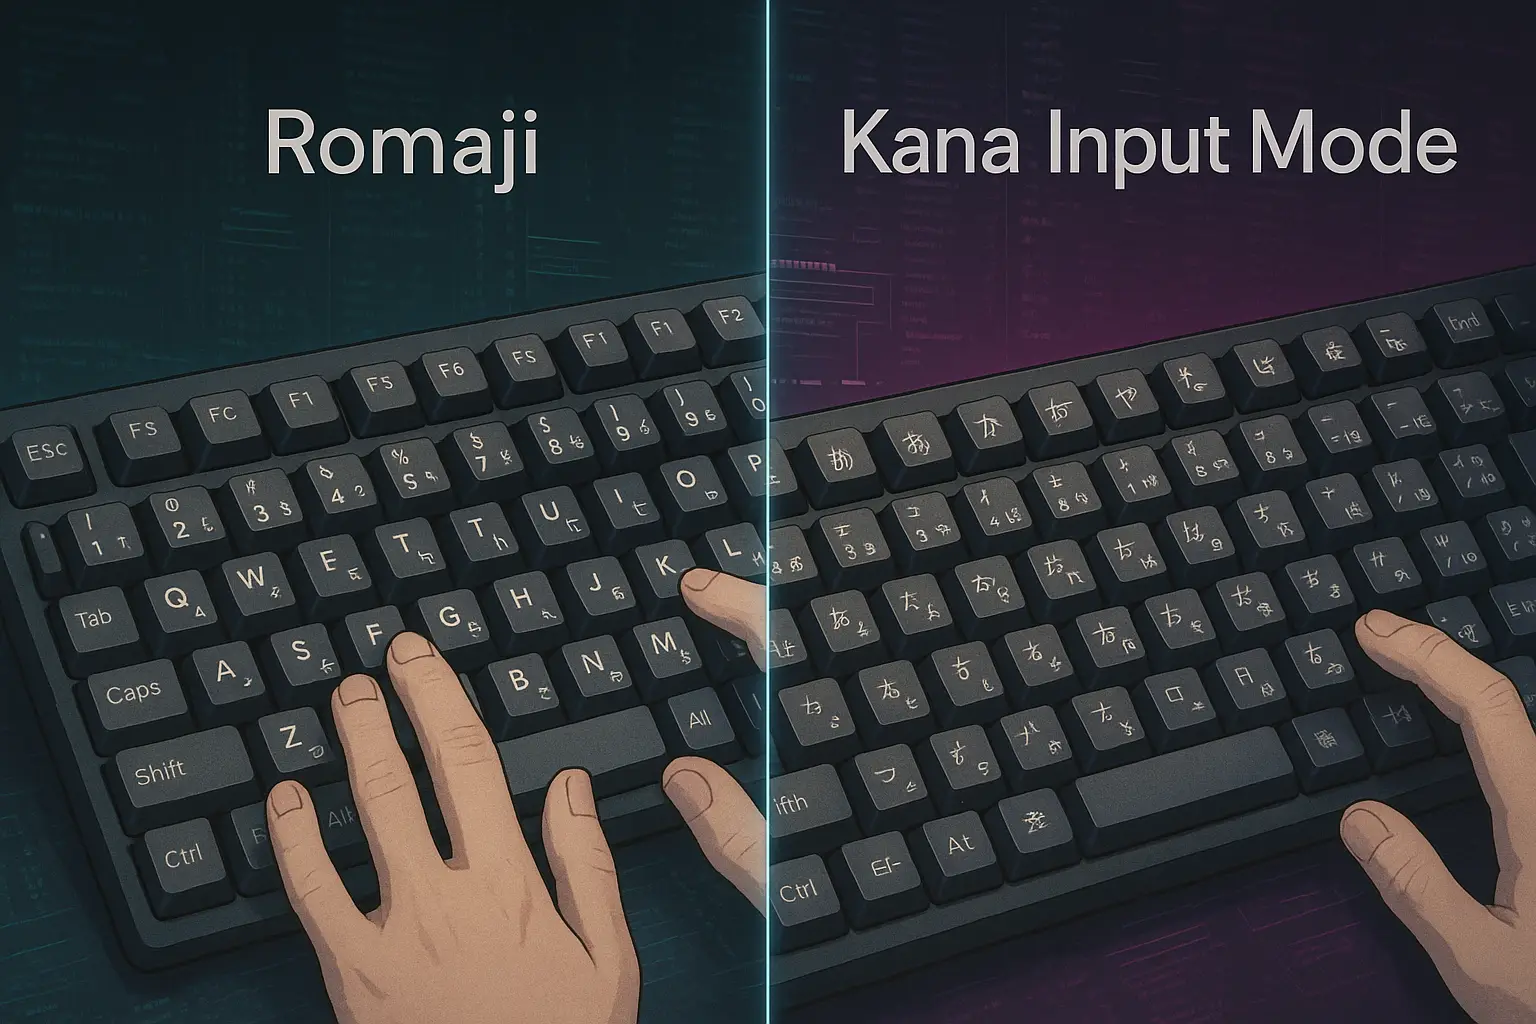
When using the JP keyboard layout, understanding how to type Japanese is just as important as the physical layout itself. That’s where Romaji and Kana input methods come in. Both methods allow you to produce Japanese text on a computer, but they work very differently, and each offers unique advantages depending on your experience level and typing goals.
What Is Romaji Input?
The most widely adopted input system for newcomers and foreign learners to enter Japanese text is Romaji input. The term “Romaji” denotes the practice of representing Japanese words through the Roman alphabet characters. Your system’s Input Method Editor (IME) will transform phonetic English letter input into Japanese characterest starting with Hiragana before converting to Katakana or Kanji using the conversion key.
Example in Action:
- You type:
konnichiwa - The IME first shows: こんにちは
- Press the 変換 (Henkan) key to get options like: 今日は, 今日は, or other contextual suggestions.
This process makes it easy for users who are familiar with English keyboards to start typing in Japanese immediately, even without knowing how the Kana characters map onto the keyboard.
Who Is It For?
Romaji input is ideal for:
- Japanese language learners
- Tourists or casual users
- Anyone using a US or non-JIS keyboard
- Those unfamiliar with Japanese syllabary or kana placement
You can use Romaji input on any keyboard, including ANSI (US), ISO (UK), or JIS (JP) layouts, as long as you enable the Japanese IME.
Downsides to Consider
While Romaji input is intuitive and accessible, it isn’t always efficient:
- You often have to type multiple letters per syllable (e.g., “ryou” for りょう).
- It slows down fluent typists, especially for longer sentences.
- You’ll constantly rely on the Henkan key to convert text, which can interrupt your flow.
Still, for most non-native users, Romaji is the go-to method, and it works perfectly fine even on a JIS keyboard layout.
What Is Kana Input?
Kana input functions through assigning particular Japanese syllables including あ (a), い (i), う (u), え (e), お (o) and additional characters to each key. When you type one key the corresponding Kana character shows up without delay because you do not need to type Roman-letter spellings. The native speakers along with professional typists who understand Kana layout by heart use this fast direct method.
Example in Action:
- Press the “A” key on a JIS keyboard, and it immediately outputs: ち (Chi)
- Press the “K” key, and you might get: に (Ni)
- No conversion needed unless you’re inputting Kanji.
Who Uses Kana Input?
Kana input is often preferred by:
- Native Japanese speakers
- Office professionals and typists in Japan
- Translators, editors, or writers working in Japanese full-time
- Students who have memorized the Kana keyboard mapping
Many government offices, schools, and publishing companies in Japan train employees on Kana input for speed and consistency.
Downsides and Learning Curve
The trade-off for this speed is a steep learning curve. The layout of Kana on the keyboard doesn’t follow QWERTY logic, it follows the gojūon order (Japanese syllabary grid), which places syllables based on pronunciation patterns. To use Kana input effectively:
- You must memorize which key produces which Kana
- You’ll need a physical JP (JIS) keyboard, since US layouts don’t label Kana
- Errors are harder to correct if you’re not fully fluent in the layout
This method isn’t practical for most learners, but for experienced users, it offers unmatched efficiency.
Key Differences Between Romaji and Kana Input
| Feature | Romaji Input | Kana Input |
|---|---|---|
| Typing Method | Type using Roman letters (e.g., konnichiwa) | Press one key per syllable (e.g., こ = 1 key) |
| Speed | Slower but more intuitive | Very fast once mastered |
| Learning Curve | Easy for beginners | Steep, requires Kana key memorization |
| Keyboard Compatibility | Works on US, JP, or any layout | Requires physical JP keyboard with Kana legends |
| Best For | Beginners, casual users | Fluent typists, native speakers |
| Input Conversion Required | Yes, must use IME + Henkan/Muhenkan | Only when converting to Kanji |
Q: What’s the best input method for typing Japanese on a keyboard?
A: For beginners, Romaji input is the easiest because it uses English letters. For fluent users, Kana input is faster and more efficient but requires memorizing the layout.
Q: Can I type in Kana without a Japanese keyboard?
A: Technically yes, but it’s not practical. Kana input is designed for JP (JIS) keyboards with Kana characters printed on each key.
Can You Use Both?
Yes, and many users do. You can easily switch between Romaji and Kana input using the Japanese IME settings. On a JP keyboard, pressing the かな (Kana) key toggles the input method instantly. On US keyboards, switching modes may involve a key combo or language bar click.
This flexibility allows users to type in Romaji for ease, then switch to Kana input once they gain more experience or need faster input in professional settings.
How to Set Up a JP Keyboard on Windows, Mac, and Linux

Setting up a JP keyboard layout is straightforward across all major operating systems. Whether you’re using a physical Japanese (JIS) keyboard or just want to enable Japanese input on your standard US keyboard, each platform provides built-in tools to switch layouts and input languages.
Windows 10/11
Step-by-Step:
- Go to Settings → Time & Language → Language.
- Under Preferred Languages, click Add a language.
- Search for Japanese and click Next.
- Choose to install the Microsoft IME, then click Install.
- Once installed, click the language icon on the taskbar to switch to Japanese.
- Click Options next to Japanese, then choose Add a keyboard → Select Japanese Keyboard (JIS).
Extra Tips:
- Press Alt + Shift or Windows + Space to toggle between languages.
- Press Alt + ` (tilde) to switch between input modes like Hiragana, Katakana, and Alphanumeric.
- You can remap physical keys using Microsoft’s PowerToys Keyboard Manager if you’re using a US keyboard but want a JIS layout experience.
Useful Tools:
- Microsoft IME provides options to toggle Romaji vs Kana, prediction preferences, and personal dictionaries.
macOS (Ventura, Monterey, and Later)
Step-by-Step:
- Open System Settings → Keyboard → Input Sources.
- Click the + button and search for Japanese.
- Select Japanese – Romaji or Japanese – Kana, depending on your preference.
- Click Add.
- Use the input menu in the top menu bar to switch between languages.
Additional Configuration:
- macOS allows you to customize key behavior like using Caps Lock to switch between Kana and Romaji.
- You can also enable Live Conversion, which automatically converts text as you type, helpful for fluent users.
Shortcut Tips:
- Press Control + Shift + J to toggle between Japanese and English.
- Press Control + J for Kana, or Control + ; for Romaji input.
macOS’s native Japanese IME is one of the most refined, especially for those using a physical JIS keyboard. It recognizes sentence context better and offers accurate Kanji suggestions.
Linux (Ubuntu, Fedora, Arch, etc.)
General Instructions (Using IBus or Fcitx):
- Go to Settings → Region & Language.
- Click + Add Input Source, then search for Japanese.
- Choose Japanese (Mozc) or Japanese (Anthy) depending on your system.
- Apply the layout and restart the session if needed.
For Advanced Users:
- Use IBus + Mozc for better integration with GTK and Qt apps.
- For Wayland desktops (like GNOME), IBus is recommended.
- KDE users may prefer Fcitx5 with Mozc for better UI consistency.
Key Bindings:
- Ctrl + Space toggles input method on/off.
- To switch between Hiragana, Katakana, or direct input, use the Input Mode switcher in your panel or system tray.
Physical Keyboard Recognition
If you’re using a physical JIS keyboard, most operating systems will auto-detect it during setup. If not:
- In Windows, go to Language Options > Japanese > Keyboards, then manually choose Japanese (106/109 Key) Keyboard.
- On macOS, it automatically switches to JIS layout if detected via USB or Bluetooth.
- On Linux, use terminal commands to set the layout (e.g.,
setxkbmap jpor configure throughlocalectl).
Compatibility Notes
- You don’t need a JP keyboard to type in Japanese—you can use Japanese input methods with any layout.
- However, if you’re using Kana input, having a physical JIS keyboard is essential since the key labels won’t match otherwise.
- Software keyboards (on-screen or touch) will automatically adapt based on selected language.
Best Japanese Keyboards (JIS) You Can Buy in 2025
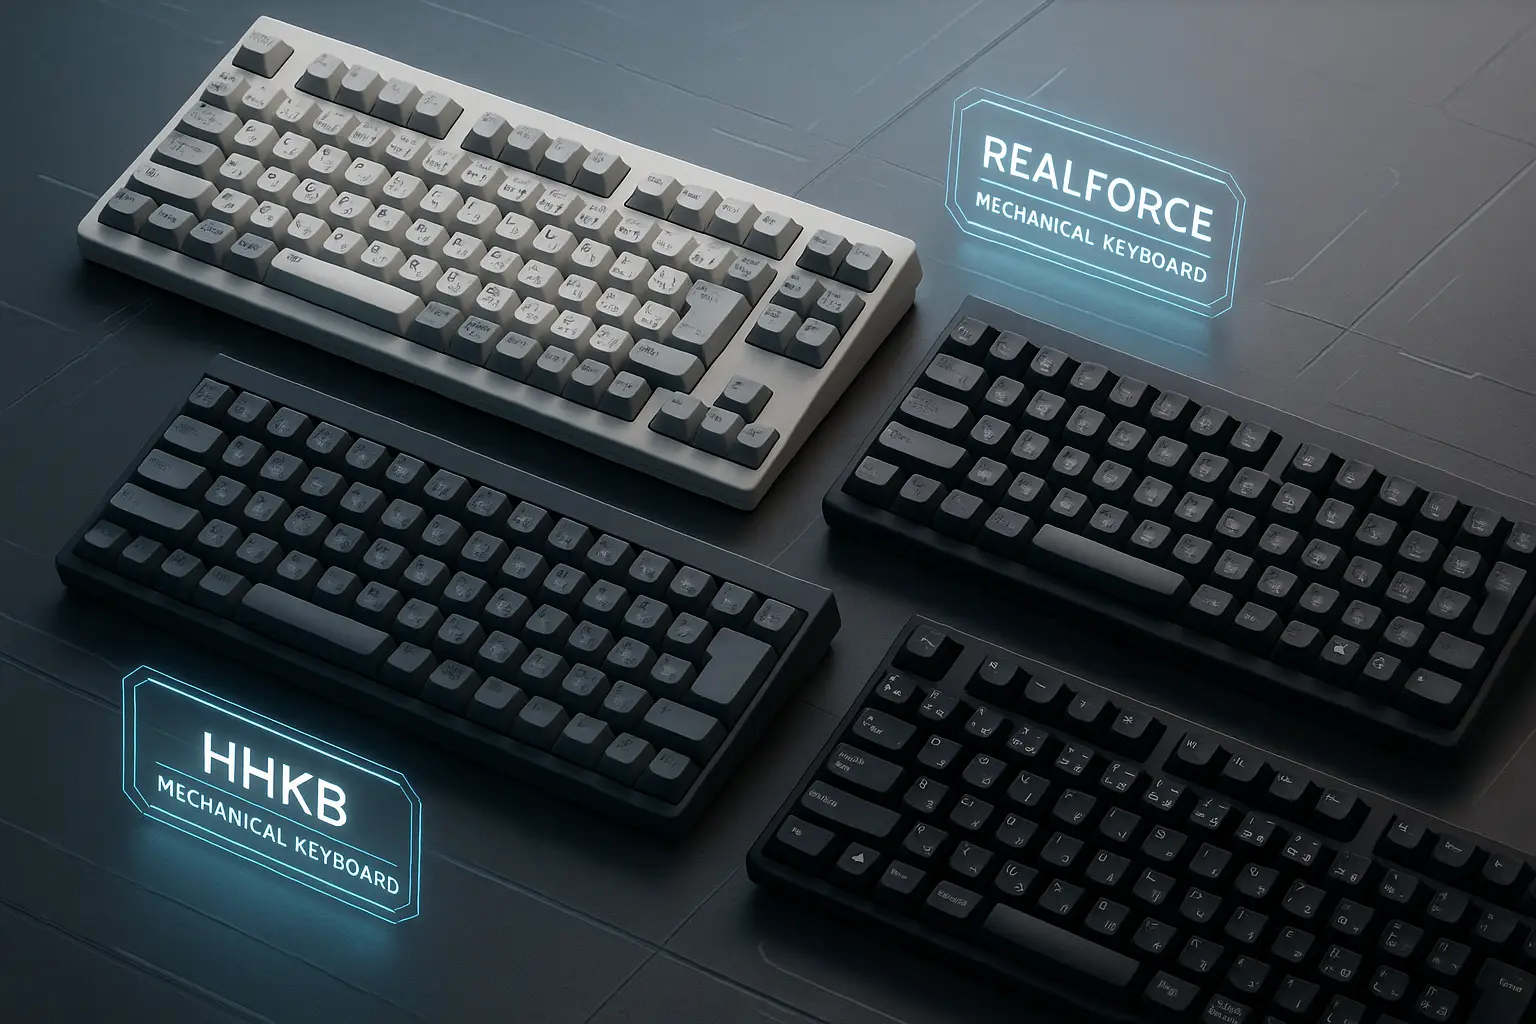
If you’ve decided to try the JP keyboard layout for yourself, choosing the right JIS-compatible keyboard is the next step. Japanese keyboards come in a variety of styles, from minimalist mechanical designs to affordable membrane options. The right choice depends on your typing needs, whether you’re writing Japanese daily, programming, or just learning the language.
Here are the best Japanese keyboards you can buy in 2025, including top-tier mechanical models and budget-friendly picks.
HHKB Professional HYBRID Type-S (Happy Hacking Keyboard)
Best for: Minimalists, coders, and professionals who prefer a compact layout
Type: Mechanical (Topre switches)
Connectivity: Bluetooth + USB-C
Layout: JIS, 60% keyboard
The HHKB series is one of the most revered keyboards in Japan. Designed with professional typists and developers in mind, the HHKB Professional HYBRID Type-S features Topre electrocapacitive switches that offer tactile precision with near-silent keystrokes.
Pros:
- Exceptionally quiet and responsive
- Lightweight, ultra-portable 60% layout
- Bluetooth support for up to 4 devices
- Durable key legends with dye-sublimation
Cons:
- Expensive (~$270+)
- No dedicated arrow keys or F-row
- Learning curve if coming from full-size boards
User Quote (Amazon Japan):
“Once you adjust to the layout, it’s hard to go back. Perfect for Japanese input and silent coding at night.”
Buy on Amazon Japan:
Realforce R3 Keyboard JIS (Full Size)
Best for: Writers, programmers, and those needing full key access
Type: Mechanical (Topre switches)
Layout: JIS, full-size with numpad
Connectivity: Wired USB and wireless (select models)
Realforce keyboards by Topre are often considered the gold standard of typing in Japan. The R3 model features a full JIS layout, with adjustable actuation and silent tactile feedback. This keyboard balances typing comfort, precision, and durability.
Pros:
- Full JIS key coverage (Henkan, Kana, etc.)
- Adjustable key sensitivity (30g–45g)
- Long lifespan and excellent build
- Ideal for heavy typists
Cons:
- Premium pricing (~$250+)
- Heavier and bulkier than 60% boards
User Review (Reddit):
“I switched from an ANSI keyboard to this Realforce JIS, and it’s amazing for coding in both Japanese and English.”
Buy on Amazon JP:
Fujitsu Wireless JIS Keyboard (Membrane)
Best for: Office work, students, and general typing
Type: Membrane
Layout: Full JIS layout
Connectivity: Wireless (2.4GHz)
This is a reliable option if you’re looking for an affordable and durable keyboard for daily Japanese typing. It includes all the JIS keys, including Kana toggles and the Henkan/Muhenkan buttons.
Pros:
- Low price (~$50–$70)
- Wireless convenience
- Comfortable keypress for a membrane keyboard
Cons:
- Not suitable for high-speed typing
- Build feels less premium
User Review (Amazon):
“Works well with IME and the layout is accurate. Great for learning Japanese typing.”
Buy on Amazon Japan
Elecom TK-FDM105TBK
Best for: Budget-conscious users
Type: Membrane
Layout: JIS
Connectivity: Wired USB
Elecom offers a range of budget-friendly keyboards, and the TK-FDM105TBK is a top pick for beginners. It has a clean Japanese layout and is plug-and-play compatible with Windows.
Pros:
- Very affordable (~$30)
- True JIS layout
- Durable keycaps despite price
Cons:
- No backlighting or wireless features
- Keys can feel mushy for fast typists
User Review (Forum):
“I bought this to practice Kana input, it’s basic, but it does the job well.”
Buy on Rakuten or Amazon Japan
Compatibility Tips
- All the above keyboards work seamlessly with Japanese IME software on Windows, macOS, and Linux.
- Make sure to switch the input language to Japanese and select the correct hardware keyboard layout (JIS) in settings.
- For international buyers, ensure the keyboard includes multilingual firmware or Unicode support if you plan to use English as well.
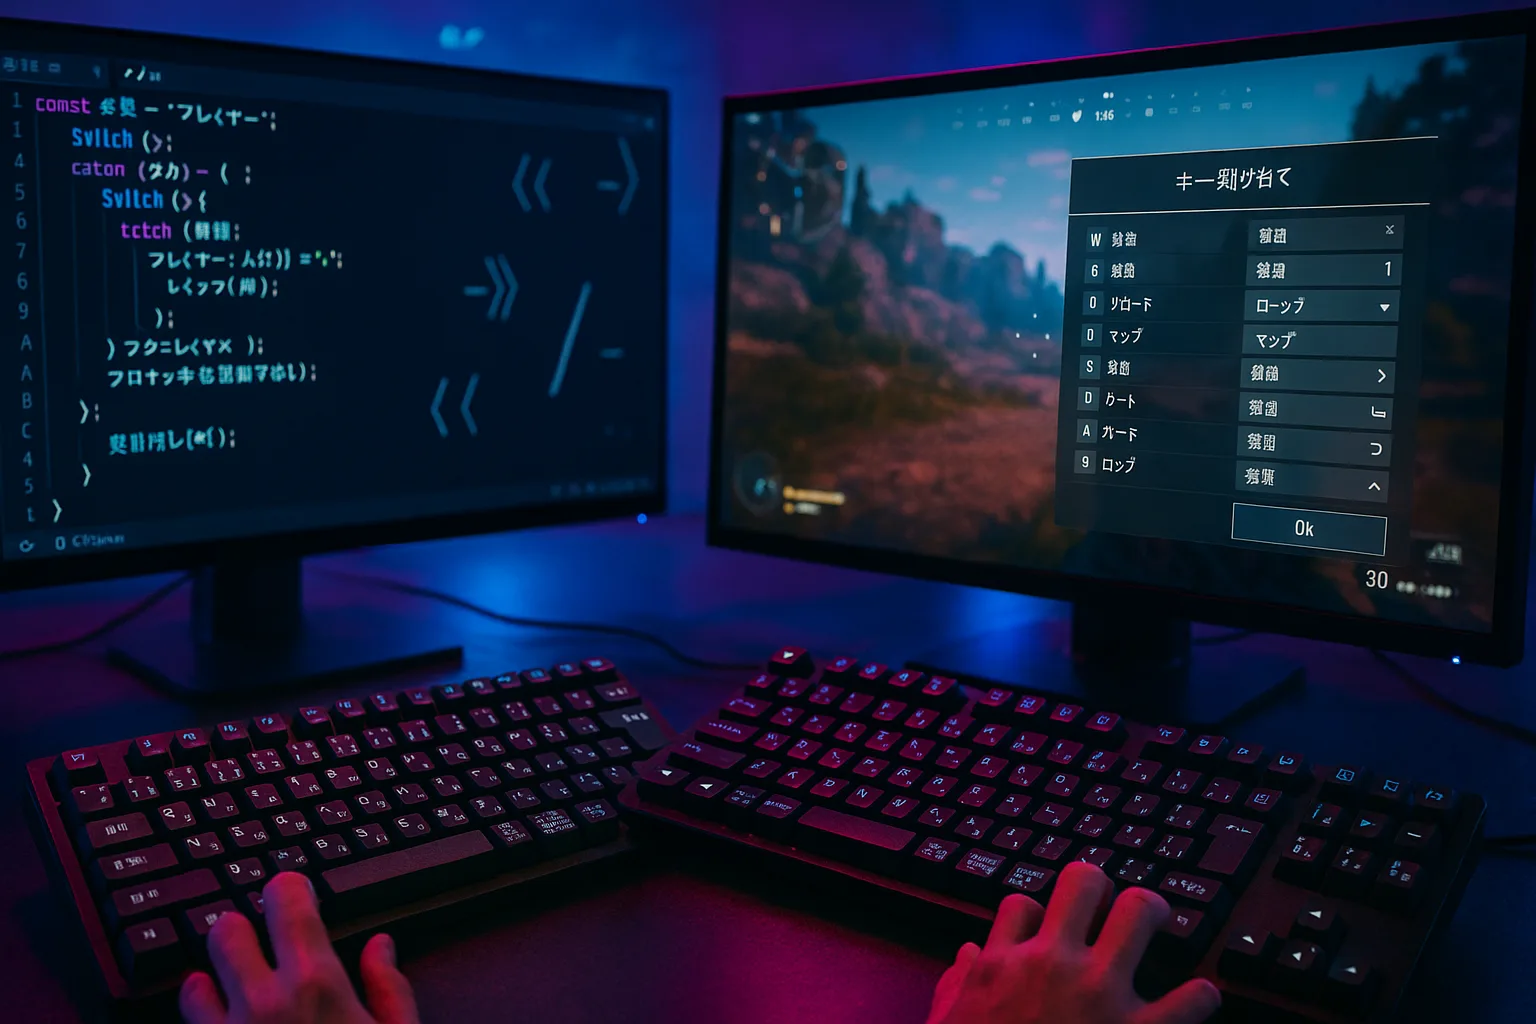
Is the JP Keyboard Good for Programming or Gaming?
When it comes to specialized tasks like coding or competitive gaming, keyboard layout can make a surprising difference in both performance and comfort. The JP keyboard layout (JIS) introduces a number of changes compared to the US ANSI layout, especially in terms of symbol placement, extra keys, and key size. So, is the JIS keyboard actually a good choice for programmers and gamers?
Coding with the JP Layout
For developers, symbol accessibility is crucial. Programming languages often require frequent use of characters like {}, [], (), ;, :, /, \, and more. On a JIS keyboard, many of these keys are either repositioned or require an extra key combination using Shift or AltGr.
For example:
- The backslash (
\) is often located where the underscore (_) sits on a US keyboard. - Braces
{}may require Shift combinations and are often shifted one key to the right. - The @ symbol is placed differently, often above the number
2, similar to UK layouts.
This leads to a steep adjustment period for coders who are used to ANSI/US layouts. While Japanese developers using Romaji are generally accustomed to the JIS symbol positions, Western developers may find it cumbersome, especially if they frequently switch between layouts.
If you’re coding in multiple languages, especially with strict syntax (like Python, JavaScript, or C++), the JP layout might slow you down unless you’re deeply familiar with it.
LSI Keyword Used: jis layout for developers
Gaming on a Japanese Keyboard
Gamers generally prioritize comfort, fast response times, and muscle memory. Most competitive or casual games are designed with the QWERTY ANSI layout in mind. On a JIS keyboard:
- The spacebar is often shorter due to the presence of extra keys like Muhenkan and Henkan. This can affect your thumb positioning during gameplay.
- Keys such as
Shift,Enter, andBackspacemay be smaller or shaped differently, depending on the keyboard. - Keybindings for games that use symbols (e.g.,
~,@,#) might require remapping or extra key presses.
In genres like MMOs, shooters, or rhythm games, players often rely on fast access to macros, weapon slots, and command keys. The JIS layout introduces a level of complexity that may interfere with instinctive gameplay.
That said, some Japanese gaming keyboards offer remappable key software (like Realforce or HHKB utility tools), allowing users to create ANSI-style layouts within JIS hardware. This hybrid approach can help gamers retain the physical feel of Japanese keyboards while maintaining their gaming muscle memory.
When to Avoid the JP Layout
While the JIS layout can work for both developers and gamers, it’s not ideal for everyone. You may want to avoid the JP layout if:
- You regularly collaborate on codebases using ANSI formatting or pre-set macros.
- You’re playing global multiplayer games where custom keybinding profiles don’t sync across devices.
- You need absolute consistency between your laptop and desktop setups.
For most users in the West, especially those who don’t type in Japanese often, sticking with ANSI might make more sense for work and play.
But if you’re fluent in Japanese, or learning the language while also gaming and coding, the JIS layout can offer a versatile experience, just be prepared for a learning curve.
History of the JIS Keyboard Layout
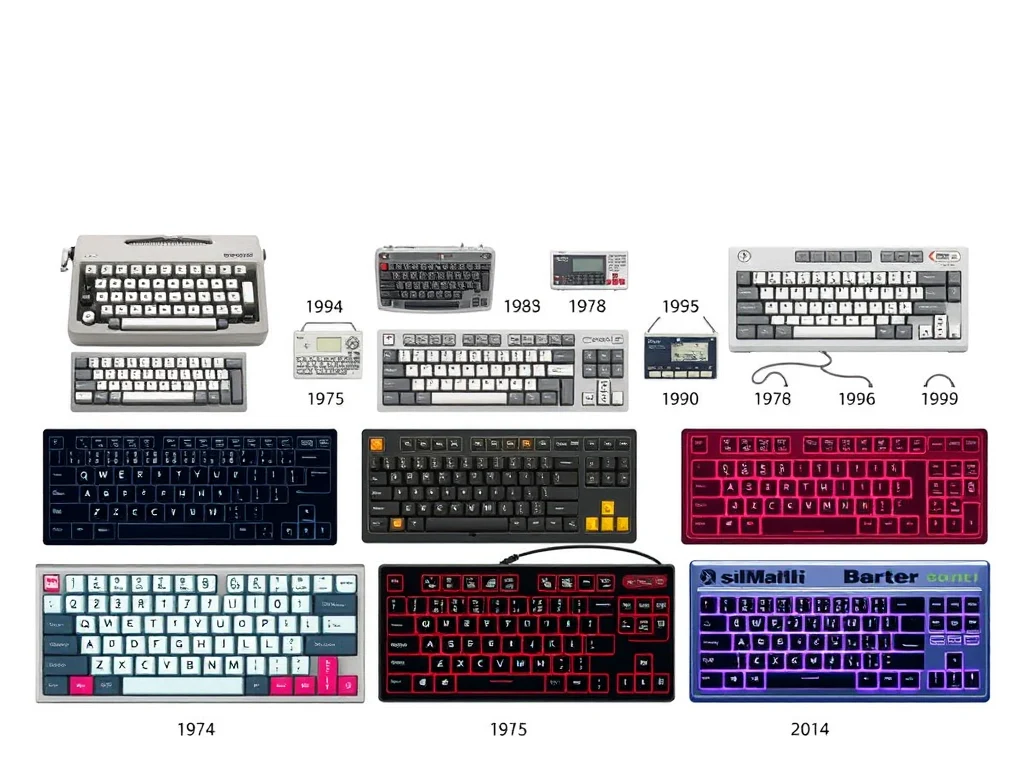
The JP keyboard layout, officially known as the JIS (Japanese Industrial Standards) keyboard, didn’t appear overnight. Its evolution reflects Japan’s unique linguistic and technological journey, from typewriters to digital word processing. Understanding the history behind the JIS layout gives context to its extra keys, its unique structure, and why it remains in use despite global ANSI and ISO alternatives.
The Beginnings: Japanese Typewriting Challenges
Before digital keyboards, typing in Japanese was done on specialized typewriters that relied on large, complex grids to accommodate thousands of Kanji characters. These machines were bulky and slow, requiring users to hunt for symbols much like on a library card catalog. Early typing systems were inefficient for widespread use, making them impractical for casual or professional writing.
The development of Romaji (Latin script) input systems and Kana-based typewriting in the mid-20th century marked a major step toward faster Japanese input. Still, the biggest leap forward came with the advent of computers and software-based IMEs (Input Method Editors), which allowed users to input Japanese syllables with fewer physical keys.
Government Standardization: The Birth of JIS
As computers became more common in the 1970s and 1980s, Japan needed a unified way to handle both Latin and Japanese scripts. This led to the establishment of the JIS layout, governed by the Japanese Industrial Standards Committee. The committee aimed to ensure that all keyboards sold in Japan followed a uniform layout to support both Kana input and Romaji input systems efficiently.
The JIS standard added several extra keys not found on US or European keyboards:
- Henkan (変換): Converts Hiragana into Kanji or Katakana.
- Muhenkan (無変換): Cancels conversion or switches input modes.
- Kana toggle key: Switches between Romaji and Kana.
- Additional symbols needed for Japanese punctuation like 「」, 、, and 。
It also rearranged some symbols and shortened keys like the spacebar to make room for these additions. The layout reflected a balance between traditional Japanese typing needs and the rising influence of QWERTY-based systems.
Comparison to Kana-Only Layouts
Before the JIS layout became the norm, there were Kana-only typewriter layouts. These assigned each key to a single syllable, resulting in a very different keymap. While fast for some users, they lacked the flexibility of Romaji input, which was easier to adopt for learners and software developers alike.
As Japanese computing progressed, Romaji input paired with JIS hardware became the most versatile and widely adopted method. It allowed users to type in Japanese using familiar Latin characters while retaining access to necessary Kana characters, Kanji conversion, and punctuation.
The JIS Layout Today
Today, the JIS keyboard remains the standard in Japan for laptops, desktops, and even some mobile keyboard attachments. It’s deeply integrated into Japanese operating systems, both Windows and macOS, and supports all major input styles.
Though it may seem confusing to outsiders, the JIS layout is the result of decades of linguistic adaptation and user feedback. It’s not just a different layout, it’s a layout built specifically to accommodate the complexities of the Japanese language, from formal business documents to casual online chat.
Real User Reviews & Experience
Understanding how real users feel about the JP keyboard layout (JIS) is just as important as technical specifications or historical context. While some people love the extra functionality it offers for typing in Japanese, others find it inconvenient for daily use, especially when switching between languages or layouts.
To give you an honest picture, we looked through Reddit discussions, Amazon reviews, tech forums, and keyboard enthusiast communities. Here’s a breakdown of what users are actually saying about the JIS layout in the real world.
Positive Feedback: Built for Japanese, Comfortable Over Time
Users who primarily type in Japanese consistently praise the JIS layout. One frequent comment is how efficient the extra keys like Henkan and Muhenkan become once you get used to them. These keys speed up Kanji conversion and toggle input modes without having to use software menus.
A user on Reddit wrote:
“At first, I was confused by the extra keys and different symbol placement, but once I got used to it, I actually type faster in Japanese than I ever did before. I can switch between Hiragana and Katakana on the fly, and the spacebar length doesn’t bother me anymore.”
On Amazon Japan, reviewers frequently mention that JIS keyboards like HHKB and Realforce are perfect for Japanese professionals, particularly writers, translators, and office workers who deal with documents in Japanese daily.
Common Complaints: Short Spacebar and Symbol Confusion
That said, not everyone loves the layout. The most common complaint from English speakers or programmers is the shortened spacebar. Because the JIS layout adds extra keys like Henkan and Muhenkan, the spacebar is often shrunk, which can be awkward for users who rely on their thumbs for fast typing or gaming.
Another issue is the rearranged punctuation. Brackets, slashes, and symbols like the underscore and at-sign (@) are in non-standard places. For people used to the ANSI layout, this creates a steep learning curve.
A coder shared this on a keyboard forum:
“I’m a developer and switched to a Japanese Realforce keyboard because I love Topre switches. But the key placement drove me nuts. Typing
{or}takes more effort than it should, and I constantly hit the wrong symbols. I eventually remapped half the keys.”
Mixed Reactions from Gamers
Gamers have a split opinion. Those playing mostly Japanese titles or using remappable keys found the experience smooth. Others who participate in competitive Western games or use WASD controls heavily noted discomfort due to different key sizes and spacing.
A Japanese gamer said:
“For Monster Hunter and JRPGs, the JIS layout is fine. But when I tried playing Valorant with it, I kept missing keybinds because my muscle memory is based on ANSI.”
Keyboard Enthusiasts: Modding the JIS Layout
Interestingly, many mechanical keyboard enthusiasts enjoy customizing JIS keyboards to merge aesthetics with function. Some users swap keycaps, remap layouts via software, or flash firmware to emulate ANSI behavior on JIS hardware. This shows the layout’s flexibility for users willing to experiment.
Is the JP Keyboard Layout Right for You?
Deciding whether the JP keyboard layout (JIS) is right for your setup depends entirely on your needs, typing habits, and language preferences. Unlike the one-size-fits-all approach of ANSI or ISO keyboards, the JIS layout was designed with the complexities of the Japanese language in mind. That makes it highly efficient in the right hands, but potentially frustrating if you’re unfamiliar with its quirks.
If you primarily type in Japanese, whether for work, school, or creative writing, the JIS layout provides essential tools like Henkan/Muhenkan keys, a dedicated Kana toggle, and native support for Japanese punctuation. These features streamline the input process, especially when paired with a proper IME. The layout becomes second nature with consistent use, and its design caters directly to the Japanese writing system’s multi-layered structure.
For bilingual users or language learners, the JIS layout offers flexibility, allowing for seamless switching between Romaji, Hiragana, Katakana, and Kanji. Many users in this group report faster typing speeds and improved fluency after a short adjustment period. However, you’ll need to spend some time learning the new key placements, especially for punctuation and symbols.
On the other hand, if your focus is coding, gaming, or typing exclusively in English, you may find the JP layout less than ideal. The shortened spacebar, shifted symbols, and extra keys can interfere with your muscle memory and slow down your workflow. In these cases, sticking with an ANSI layout or using a programmable keyboard may be the better option.
Still unsure if it’s for you? One way to find out is to try the JIS layout virtually using IME tools on your operating system. Both Windows and macOS allow you to switch your keyboard input to Japanese without buying new hardware. This lets you test the feel of the layout and see how it integrates with your workflow.
Ultimately, the JP keyboard layout isn’t just different, it’s purpose-built. If your typing needs align with its strengths, it can significantly enhance your productivity and comfort when working in Japanese.
FAQs
What keyboard layout is used in Japan?
Japan primarily uses the JIS (Japanese Industrial Standard) keyboard layout. It includes additional keys like Henkan, Muhenkan, and a dedicated Kana toggle to support the complexities of the Japanese writing system. The layout also modifies the position of punctuation and symbols to accommodate both Romaji and Kana input.
How to switch to JP keyboard?
To switch to a JP keyboard layout on your computer:
- On Windows:
- Go to Settings > Time & Language > Language.
- Add “Japanese” as a preferred language.
- After installation, click “Options” under Japanese and add the Microsoft IME.
- Toggle between layouts using
Alt + Shiftor the language bar.
- On macOS:
- Go to System Preferences > Keyboard > Input Sources.
- Click the
+icon and add “Japanese”. - Use the menu bar or shortcut (
Command + Space) to switch layouts.
You don’t need a physical JP keyboard to use the layout, IME tools let you type in Japanese with any keyboard.
What is the Japanese keyboard style?
The Japanese keyboard style, known as the JIS layout, includes more keys than standard US or ISO keyboards. It supports both Romaji (Latin letters) and Kana (Japanese syllabaries) input. Keys like Henkan (convert), Muhenkan (non-convert), and the Kana toggle are unique to this layout. The keyboard is often used alongside software-based IMEs to allow typing in Kanji, Katakana, and Hiragana.
What is the difference between QWERTY and JIS keyboard?
While both the QWERTY and JIS layouts use the same alphabetical key order, the JIS layout features more keys to accommodate Japanese language input. Key differences include:
- Shorter spacebar to make room for
Henkan,Muhenkan, and input mode switches - Extra keys for direct Kana input
- Different symbol placement, especially for brackets, slashes, and quotes
- Designed to integrate smoothly with Japanese IME systems
The QWERTY layout is standard in the US and Europe, while JIS is optimized for typing in Japanese.
Can I type Japanese without a JP keyboard?
Yes, you can type in Japanese without a physical JP keyboard. Both Windows and macOS offer Japanese IME tools that let you type phonetically using Romaji. The IME then converts the text into Hiragana, Katakana, or Kanji. This makes it easy to write Japanese on a standard US or ISO keyboard, though learning the JP layout can increase efficiency if you type in Japanese often.